Achieving a flawless finish on a guitar is an art form, and the choice of finish plays a significant role in both the instrument’s aesthetics and its tonal qualities. Among the various options available, nitrocellulose lacquer stands out as a classic choice for many luthiers and guitar manufacturers.
This article will serve as a comprehensive guide to understanding, applying, and maintaining a nitrocellulose lacquer guitar finish. From understanding its properties to troubleshooting common issues, we’ll cover everything you need to know to achieve a professional-grade finish.
Whether you’re a seasoned luthier or a hobbyist building your first guitar, mastering the art of nitrocellulose lacquer application is a valuable skill. With careful preparation, proper technique, and a bit of patience, you can achieve a beautiful and durable finish that enhances the beauty and sound of your instrument.
Understanding Nitrocellulose Lacquer: Properties and Advantages
Nitrocellulose lacquer, often referred to as “nitro,” is a type of coating derived from cellulose nitrate. It’s a solvent-based finish known for its fast-drying properties and ability to create a thin, flexible film.
One of the primary advantages of nitrocellulose lacquer guitar finishes is their impact on the instrument’s tone. Many believe that the thin, flexible nature of nitro allows the wood to vibrate more freely compared to thicker, more rigid finishes like polyurethane.
This enhanced vibration is said to contribute to a richer, more resonant sound, which is particularly prized in acoustic instruments. Nitro also ages gracefully, developing a desirable “checking” or cracking pattern over time that many players find aesthetically pleasing.
Another benefit is its ease of repair. Unlike some other finishes, nitrocellulose lacquer can be easily spot-repaired or touched up without requiring a complete refinish.
The relatively soft nature of nitrocellulose also contributes to its unique aging process. As the finish ages, it can develop a vintage look that many guitar enthusiasts desire.
Furthermore, the thinness of the finish allows for greater transfer of sound from the wood. This is a key reason why many high-end guitars still feature nitrocellulose lacquer finishes.
While modern finishes like polyurethane offer greater durability, they often lack the tonal characteristics and aesthetic appeal of nitrocellulose. This makes nitro a preferred choice for those seeking a vintage vibe.
The application of nitrocellulose lacquer can be more labor-intensive than other finishes. However, the resulting tone and appearance are often worth the extra effort for discerning guitar builders and players.
Safety Precautions When Working with Nitrocellulose Lacquer
Working with nitrocellulose lacquer requires strict adherence to safety precautions. This is due to the volatile and flammable nature of the solvents it contains.
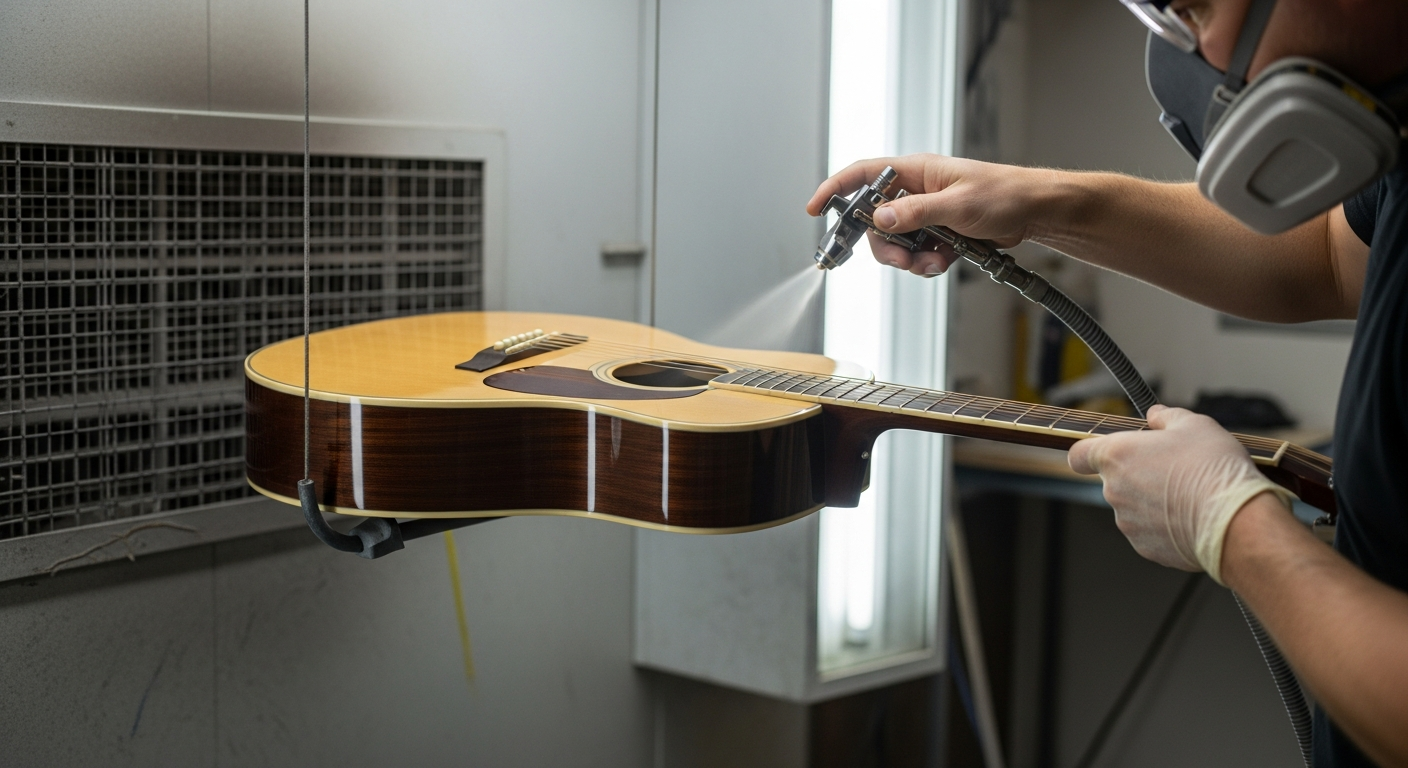
Always work in a well-ventilated area to avoid inhaling harmful fumes. A spray booth with proper ventilation is ideal, as it helps to remove airborne particles and fumes from the work environment.
Wear a respirator specifically designed for organic vapors to protect your lungs from the harmful effects of the solvents. Ensure the respirator cartridges are fresh and rated for the specific chemicals you’re working with.
Additionally, wear appropriate personal protective equipment (PPE), including gloves and eye protection. Nitrile gloves are a good choice as they resist the solvents in nitrocellulose lacquer.
Keep all sources of ignition away from the work area, including open flames, sparks, and static electricity. Nitrocellulose lacquer is highly flammable, and even a small spark can ignite the vapors.
It’s also important to dispose of used lacquer and rags properly. Soak used rags in water and place them in a sealed metal container to prevent spontaneous combustion.
Never spray lacquer near open flames or pilot lights. The vapors can travel and ignite, creating a serious fire hazard.
Consider investing in a fire extinguisher specifically designed for flammable liquids. Having one readily available can be crucial in case of an accident.
Always read and understand the Material Safety Data Sheet (MSDS) for the specific nitrocellulose lacquer you are using. This document provides detailed information about the product’s hazards and safe handling procedures.
Store nitrocellulose lacquer in a cool, dry place away from direct sunlight and heat. This helps to prevent the lacquer from degrading and reduces the risk of fire.
Preparing the Guitar Body for Lacquer
Proper preparation of the guitar body is essential for achieving a flawless nitrocellulose lacquer guitar finish. The surface must be smooth, clean, and free from any imperfections that could show through the finish.
Start by sanding the entire guitar body with progressively finer grits of sandpaper. Begin with a coarser grit, such as 180 or 220, to remove any scratches or imperfections, then move to finer grits like 320, 400, and finally 600.
| Step | Grit | Purpose |
|---|---|---|
| Initial Sanding | 180-220 | Remove scratches and imperfections |
| Intermediate Sanding | 320 | Smooth the surface |
| Fine Sanding | 400 | Prepare for sealer |
| Final Sanding | 600 | Ensure a smooth base for lacquer |
After sanding, thoroughly clean the guitar body to remove all dust and debris. Use a tack cloth or a clean, lint-free cloth dampened with mineral spirits to wipe down the surface.
Pay close attention to edges and corners, as these areas are prone to collecting dust. A small brush can be helpful for removing dust from hard-to-reach areas.
Inspect the guitar body carefully for any remaining imperfections, such as dents or scratches. Address these issues before proceeding to the next step.
Consider using a wood filler to repair any significant imperfections. Apply the filler according to the manufacturer’s instructions and sand it smooth once it has dried.
Ensure the guitar body is completely dry before applying any finish. Moisture can interfere with the adhesion of the lacquer and lead to problems later on.
If you are using a figured wood, such as maple, consider using a pore filler to enhance the grain. This will help to create a smoother, more even surface for the lacquer.
Applying a Sealer Coat
Applying a sealer coat is a crucial step in the finishing process. The sealer helps to fill the pores of the wood, creating a smooth, even surface for the lacquer to adhere to.
There are several types of sealers available, including nitrocellulose-based sealers and vinyl sealers. Nitrocellulose sealers are compatible with nitrocellulose lacquer and provide a good base for the finish.
Apply the sealer in thin, even coats, following the manufacturer’s instructions. Allow each coat to dry completely before sanding lightly with fine-grit sandpaper, such as 400 or 600 grit.
This sanding process, known as “leveling,” helps to create a perfectly smooth surface for the lacquer. Repeat the process of applying and sanding the sealer until the wood pores are completely filled and the surface is smooth to the touch.
The sealer coat also helps to prevent the lacquer from sinking into the wood. This ensures a more uniform and glossy finish.
When applying the sealer, be sure to overlap each pass slightly. This will help to prevent streaks and ensure even coverage.
Consider using a spray gun for applying the sealer. This will allow you to achieve a more even and consistent coat than brushing or wiping.
If you are brushing or wiping the sealer, use a high-quality brush or lint-free cloth. This will help to minimize imperfections in the finish.
After sanding the sealer, remove all dust and debris with a tack cloth. This will ensure a clean surface for the lacquer.
Applying Nitrocellulose Lacquer: A Step-by-Step Guide
Applying nitrocellulose lacquer requires patience, practice, and attention to detail. The goal is to achieve a smooth, even finish without runs, drips, or orange peel.
Before you begin, make sure your spray gun is properly adjusted and calibrated. Practice spraying on a piece of scrap wood to get a feel for the spray pattern and the amount of lacquer being applied.
Apply the lacquer in thin, even coats, overlapping each pass by about 50%. Keep the spray gun moving at a consistent speed and distance from the guitar body to avoid uneven coverage.
Allow each coat to dry completely before applying the next. The drying time will vary depending on the temperature and humidity, but typically it takes several hours or overnight.
Apply multiple thin coats of lacquer rather than a few thick coats. This will help to prevent runs and drips and allow the lacquer to dry and cure properly.
Maintain a consistent distance between the spray gun and the guitar body. Varying the distance can lead to uneven coverage and imperfections.
Check the spray pattern of your gun regularly to ensure it is spraying evenly. A clogged nozzle can cause streaks and uneven coverage.
Avoid spraying in direct sunlight, as this can cause the lacquer to dry too quickly. This can lead to orange peel and other imperfections.
If you notice any runs or drips, stop spraying immediately and allow the lacquer to dry completely. Then, carefully sand away the imperfection before applying another coat.
Consider using a turntable to rotate the guitar body while spraying. This can make it easier to achieve even coverage.
Sanding and Buffing Nitrocellulose Lacquer
After applying the final coat of lacquer and allowing it to dry completely, the next step is to sand and buff the finish. This process will remove any imperfections and create a smooth, glossy surface.
Start by wet-sanding the lacquer with progressively finer grits of sandpaper, beginning with 600 or 800 grit. Use a sanding block to ensure a flat, even surface.
- Wet-sand with 600-800 grit sandpaper
- Progress to 1000-1200 grit
- Follow with 1500-2000 grit
- Use a sanding block for even pressure
- Keep the sandpaper and surface wet
After wet-sanding, use a buffing wheel with various compounds to polish the finish. Start with a cutting compound to remove any remaining scratches, then move to a polishing compound to create a high-gloss shine.
When wet-sanding, add a few drops of dish soap to the water. This will help to lubricate the sandpaper and prevent it from clogging.
Be careful not to sand through the lacquer, especially on edges and corners. These areas are more prone to damage.
Use a variable-speed buffer to control the speed of the buffing wheel. Start with a low speed and gradually increase it as needed.
Apply the buffing compound sparingly to avoid creating a mess. A little bit goes a long way.
Clean the buffing wheel regularly to remove any buildup of compound. This will help to prevent scratches and ensure a smooth finish.
After buffing, wipe down the guitar with a clean, lint-free cloth to remove any remaining compound. This will reveal the true shine of the finish.
Common Nitrocellulose Lacquer Issues and How to Fix Them
Despite careful preparation and application, several issues can arise when working with nitrocellulose lacquer. Knowing how to identify and fix these problems is essential for achieving a professional-quality finish.
One common issue is “orange peel,” which is a textured surface that resembles the skin of an orange. This can be caused by spraying the lacquer too thick, using the wrong spray gun settings, or spraying in a room that is too cold or humid.
To fix orange peel, wet-sand the surface with fine-grit sandpaper to level the texture, then buff to restore the gloss. In severe cases, you may need to apply additional coats of lacquer and repeat the sanding and buffing process.
Another common problem is “runs” or “drips,” which occur when the lacquer is applied too heavily and runs down the surface. To fix runs, allow the lacquer to dry completely, then carefully scrape away the excess with a razor blade or a sharp chisel.
“Checking” or cracking can occur over time as the lacquer ages and contracts. While some players find this aesthetically pleasing, others may want to repair it.
To minimize checking, avoid exposing the guitar to extreme temperature or humidity changes. If checking does occur, it can be difficult to repair completely, but you can often improve the appearance by carefully filling the cracks with lacquer and buffing the surface.
Fish eye occurs when contaminants like silicone are present on the surface. The lacquer repels from these areas, leaving small craters.
To avoid fish eye, thoroughly clean the surface with a wax and grease remover before applying the lacquer. You can also add a fish eye eliminator to the lacquer.
Bubbling can occur if the lacquer is applied too quickly or if the underlying layers are not fully cured. Trapped solvents create bubbles in the finish.
Prevent bubbling by applying thin coats and allowing ample drying time between coats. If bubbles do occur, sand them out and reapply the lacquer.
Troubleshooting Nitro Finish Problems
Pinholes, small imperfections in the finish, can result from air bubbles trapped during application. Prevent this by applying thin coats and allowing proper drying time.
To address pinholes, lightly sand the area and apply additional thin coats of lacquer. Ensure each coat dries thoroughly before proceeding.
Blushing, a cloudy or hazy appearance, often occurs in humid conditions. Moisture trapped in the lacquer prevents it from drying correctly.
Combat blushing by using a retarder thinner, which slows the drying process and allows moisture to escape. Alternatively, use a dehumidifier in your workspace.
Solvent pop happens when solvents evaporate too quickly, creating bubbles. Proper thinning and controlled drying environments are key to preventing this.
If solvent pop occurs, sand the surface smooth and reapply the lacquer, ensuring proper thinning and controlled drying.
Lifting can happen when a new coat of lacquer softens and wrinkles an existing layer. This is often caused by incompatible thinners or applying too thick a coat.
Prevent lifting by using compatible thinners and applying thin, even coats. If lifting occurs, sand down the affected area and reapply the finish.
Cratering is similar to fish eye but often caused by dust or other particles settling on the wet finish. Maintaining a clean workspace is crucial.
To fix cratering, sand the affected area smooth and reapply the lacquer in a clean environment. Consider using a tack cloth to remove dust before spraying.
Maintaining Your Nitrocellulose Lacquer Guitar Finish
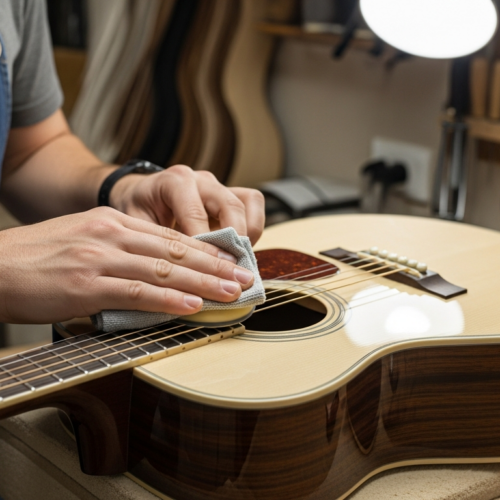
Proper maintenance is essential for preserving the beauty and integrity of your nitrocellulose lacquer guitar finish. Regular cleaning and polishing will help to protect the finish from scratches, dirt, and grime.
Use a soft, lint-free cloth to wipe down the guitar after each use. Avoid using harsh chemicals or abrasive cleaners, as these can damage the finish.
Apply a guitar polish specifically designed for nitrocellulose lacquer finishes on a regular basis. These polishes contain gentle abrasives that help to remove dirt and grime without scratching the finish.
Store your guitar in a case when not in use to protect it from dust, scratches, and temperature changes. Avoid exposing your guitar to direct sunlight or extreme temperatures, as these can damage the finish.
Avoid using polishes that contain silicone, as these can interfere with future repairs. Silicone can prevent new lacquer from adhering properly.
If you spill anything on the guitar, wipe it off immediately. Liquids can stain or damage the finish if left to sit for too long.
Consider using a humidifier in your guitar case to maintain a consistent humidity level. This will help to prevent the wood from drying out and cracking.
If you notice any scratches or imperfections in the finish, address them promptly. Small scratches can often be buffed out with a polishing compound.
Avoid using your guitar as a resting place for objects. This can scratch or damage the finish.
Conclusion
Nitrocellulose lacquer remains a popular choice for guitar finishes due to its tonal qualities, ease of repair, and classic aesthetic. Achieving a flawless nitro finish requires careful preparation, attention to detail, and a bit of patience.
By following the steps outlined in this guide, you can master the art of applying and maintaining a nitrocellulose lacquer guitar finish. A well-executed nitro finish not only enhances the beauty of your instrument but also contributes to its overall sound and playability.
The journey to mastering nitrocellulose lacquer application might seem daunting at first. However, the rewards of a beautifully finished instrument are well worth the effort.
Remember to prioritize safety, take your time, and practice consistently. With dedication, you can achieve professional-quality results.
Experiment with different techniques and products to find what works best for you. The world of guitar finishing is vast and ever-evolving.
Embrace the challenges and celebrate your successes. Each finished guitar is a testament to your skill and dedication.