Oil based guitar finishes offer a unique and time-honored approach to luthierie. They provide a natural aesthetic and tactile experience that many guitarists and builders find appealing. This article will explore the nuances of using oil based finishes, including their benefits, drawbacks, application techniques, and maintenance.
We will also delve into the different types of oils suitable for guitar finishing, such as tung oil and linseed oil finish, and how to achieve a professional-quality result. Whether you are a seasoned luthier or a hobbyist, understanding the art of the oil based guitar finish can significantly enhance the beauty and playability of your instrument.
The goal is to provide practical knowledge and guidance for anyone interested in exploring this traditional method. Choosing the right materials and techniques can make all the difference in achieving a durable and visually stunning oil based guitar finish.
The Appeal of Oil-Based Finishes: Benefits and Drawbacks
Oil based finishes have gained popularity among luthiers and guitar enthusiasts for several reasons. One of the most significant advantages is the natural look and feel they impart to the wood, enhancing its grain and texture without creating a thick, plastic-like coating.
Unlike synthetic finishes, oil based finishes allow the wood to breathe, which some believe contributes to a more resonant and responsive instrument. This breathability also means that the wood can continue to age and develop its tonal qualities over time.
Another benefit of oil based finishes is their ease of application and repair. Minor scratches and dings can often be buffed out or touched up with a fresh coat of oil, making maintenance relatively straightforward compared to more rigid finishes.
The application process is also less demanding in terms of equipment and environment, reducing the need for specialized spray booths and ventilation systems. This makes oil based finishes an attractive option for smaller workshops and DIY projects.
However, oil based finishes also have their drawbacks. They typically offer less protection against moisture, chemicals, and physical abrasion compared to harder finishes like lacquer or polyurethane.
This means that guitars with oil based finishes may require more frequent maintenance and care to prevent damage. The curing time for oil based finishes can also be significantly longer, often taking weeks or even months to fully harden, depending on the type of oil and environmental conditions.
Additionally, achieving a high-gloss finish with oil can be challenging and may require specialized techniques and multiple coats. The level of sheen is generally more subdued, which may not appeal to everyone’s aesthetic preferences.
Despite these limitations, the unique aesthetic and tactile qualities of oil based finishes continue to make them a popular choice for many luthiers and guitarists. Weighing these benefits and drawbacks is crucial in determining whether an oil based finish is the right option for a particular instrument and player.
Selecting the Best Oil for Your Guitar: Tung Oil, Linseed Oil, and More
Choosing the right oil is crucial for achieving the desired finish and protection for your guitar. Tung oil and linseed oil are two of the most popular choices, each with its unique properties and characteristics.
Tung oil, derived from the nuts of the tung tree, is known for its durability and water resistance. It penetrates the wood deeply, providing a tough and flexible finish that enhances the wood’s natural grain.
| Oil Type | Durability | Water Resistance | Drying Time |
|---|---|---|---|
| Tung Oil | High | Good | Medium |
| Linseed Oil | Medium | Fair | Long |
| Walnut Oil | Medium | Fair | Medium |
| Danish Oil | Medium | Fair | Short |
Linseed oil finish, extracted from flax seeds, offers a warm, amber hue and a smooth, satin finish. It is relatively easy to apply and provides good penetration, but it is less durable and water-resistant than tung oil.
Other oils, such as walnut oil and Danish oil, are also used in guitar finishing, each offering a slightly different combination of properties. Walnut oil provides a similar finish to linseed oil but may be slightly more durable, while Danish oil is a blend of oils and varnishes designed for quick drying and easy application.
When selecting an oil, consider the type of wood, the desired aesthetic, and the level of protection needed. For hardwoods that require extra durability, tung oil is often the preferred choice, while linseed oil may be better suited for softer woods or when a vintage look is desired.
Experimenting with different oils and blends can help you discover the perfect finish for your specific project. Always follow the manufacturer’s instructions and take appropriate safety precautions when working with oil based finishes.
Preparing the Wood Surface for Oil Finishing
Proper preparation of the wood surface is essential for achieving a flawless oil based guitar finish. The goal is to create a smooth, clean, and even surface that allows the oil to penetrate evenly and adhere properly.
Start by sanding the wood with progressively finer grits of sandpaper, beginning with a coarser grit to remove any imperfections and then moving to finer grits to refine the surface. Typically, starting with 120-grit sandpaper and working up to 320-grit or 400-grit is sufficient for most hardwoods.
After sanding, remove all dust and debris from the wood surface. A vacuum cleaner with a soft brush attachment is effective for removing loose dust, followed by a tack cloth to pick up any remaining particles.
For oily or resinous woods, such as rosewood or ebony, it may be necessary to degrease the surface with a solvent like naphtha or mineral spirits. This helps to remove excess oils that can interfere with the oil’s penetration and adhesion.
If the wood has open pores, consider using a grain filler to create a smoother surface. Grain fillers are typically applied after the initial sanding and help to fill in the pores, reducing the amount of oil needed and creating a more uniform finish.
Once the grain filler is dry, sand it lightly with fine-grit sandpaper to remove any excess. Before applying the oil, perform a final cleaning to ensure the surface is completely free of dust and contaminants.
Taking the time to properly prepare the wood surface will significantly improve the final result. A well-prepared surface allows the oil to penetrate evenly, creating a durable and beautiful finish that enhances the wood’s natural characteristics.
Applying Oil Finishes: Techniques for a Smooth Result
Applying oil finishes requires patience and attention to detail to achieve a smooth and even result. The key is to apply thin, even coats and allow each coat to fully penetrate and dry before applying the next.
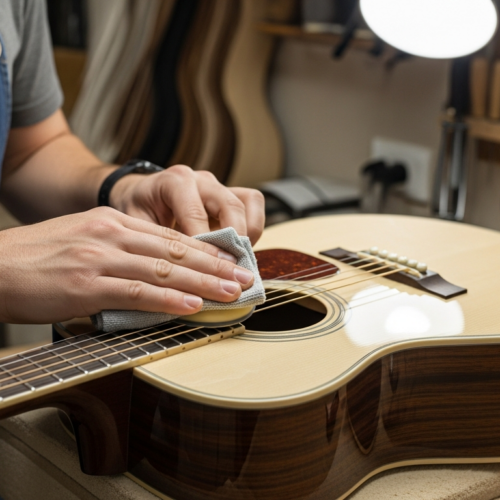
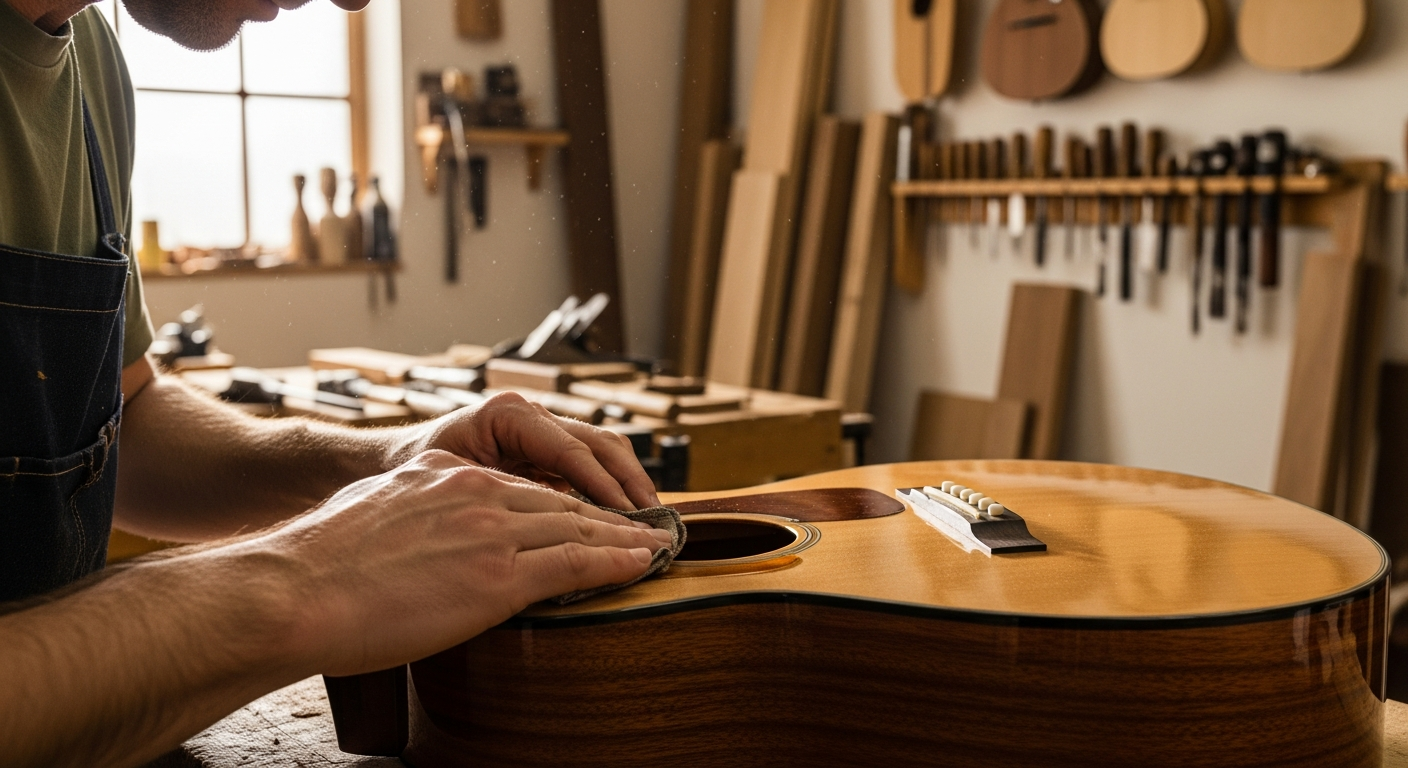
There are several methods for applying oil finishes, including using a lint-free cloth, a brush, or even your fingers. A lint-free cloth is generally preferred for its ability to apply thin, even coats and minimize the risk of brush marks.
When using a cloth, dampen it with oil and apply it to the wood surface in a circular motion, working the oil into the grain. After applying a thin coat, wipe off any excess oil with a clean, dry cloth.
This step is crucial to prevent the oil from pooling and creating a sticky or uneven finish. Allow the first coat to dry completely, typically for 24 to 48 hours, depending on the type of oil and environmental conditions.
After the first coat is dry, lightly sand the surface with fine-grit sandpaper (400-grit or higher) to remove any imperfections and create a smooth base for the next coat. Remove any dust and debris before applying the next coat of oil.
Repeat the process of applying thin coats, wiping off the excess, and allowing each coat to dry completely. The number of coats needed will depend on the desired level of sheen and protection, but typically 3 to 5 coats are sufficient.
For a higher-gloss finish, you can lightly buff the final coat with a soft cloth or polishing compound. Always follow the manufacturer’s instructions and take appropriate safety precautions when working with oil based finishes.
Proper application techniques are essential for achieving a professional-quality oil based guitar finish. Patience and attention to detail will reward you with a beautiful and durable finish that enhances the natural beauty of the wood.
Drying and Curing Oil Finishes: Patience is Key
Drying and curing are critical steps in the oil finishing process, and patience is essential for achieving a durable and long-lasting finish. The drying process involves the evaporation of solvents from the oil, while the curing process involves the polymerization of the oil molecules, creating a hard and protective film.
The drying time for oil finishes can vary depending on the type of oil, the thickness of the coats, and the environmental conditions. Generally, each coat should be allowed to dry for at least 24 to 48 hours before applying the next coat.
- Ensure proper ventilation
- Maintain consistent temperature
- Avoid direct sunlight
- Use a drying cabinet if possible
- Allow ample time between coats
Proper ventilation is crucial for the drying process, as it helps to remove the evaporating solvents and prevent the buildup of fumes. A well-ventilated workspace will also help to speed up the drying time and ensure a more even finish.
Maintaining a consistent temperature and humidity level is also important for proper drying and curing. Extreme temperature fluctuations can cause the oil to dry unevenly, while high humidity can slow down the drying process and increase the risk of clouding or hazing.
Avoid exposing the oil finish to direct sunlight during the drying process, as this can cause the oil to yellow or darken. Indirect light is best for ensuring a consistent and even drying process.
The curing process can take several weeks or even months to complete, depending on the type of oil and environmental conditions. During this time, the oil molecules continue to polymerize, creating a harder and more durable finish.
Maintaining and Repairing Oil-Finished Guitars
Maintaining an oil-finished guitar involves regular cleaning and occasional re-oiling to keep the finish looking its best and protect the wood. Unlike guitars with synthetic finishes, oil-finished guitars require a gentler approach to cleaning and maintenance.
For routine cleaning, use a soft, lint-free cloth to wipe down the guitar after each use. This helps to remove fingerprints, dust, and other debris that can accumulate on the surface.
Avoid using harsh chemicals or abrasive cleaners, as these can damage the oil finish and strip away the protective layer. Instead, use a mild guitar polish specifically designed for oil finishes, or simply dampen the cloth with a small amount of water.
To re-oil the finish, apply a thin coat of the same oil used for the original finish, following the same application techniques. Before re-oiling, clean the guitar thoroughly and lightly buff the surface with fine-grit sandpaper (600-grit or higher) to remove any imperfections.
Apply the oil with a lint-free cloth, working it into the grain and wiping off any excess. Allow the oil to dry completely, typically for 24 to 48 hours, before handling the guitar.
For minor scratches and dings, you can often buff them out with a soft cloth or polishing compound. If the damage is more severe, you may need to re-sand the area and apply a fresh coat of oil.
Regular maintenance and prompt repairs will help to keep your oil-finished guitar looking and sounding its best for years to come. By following these simple guidelines, you can protect the wood and preserve the natural beauty of the oil finish.
Addressing Common Issues with Oil Based Guitar Finish
While oil based guitar finishes offer a beautiful and natural aesthetic, they can sometimes present specific challenges. Understanding these common issues and how to address them is crucial for achieving a successful and long-lasting finish.
One common issue is clouding or hazing, which can occur when moisture becomes trapped in the oil finish. This often happens when the oil is applied in humid conditions or when the wood is not properly dried before finishing.
To prevent clouding, ensure that the wood is thoroughly dry and that the oil is applied in a well-ventilated area with low humidity. If clouding does occur, you can try gently warming the surface with a heat gun or hairdryer to evaporate the moisture.
Another issue is the formation of a sticky or tacky surface, which can result from applying too much oil or not wiping off the excess properly. This can also happen if the oil is not allowed to dry completely between coats.
To resolve a sticky finish, try wiping the surface with a clean cloth dampened with mineral spirits or naphtha. This can help to remove the excess oil and allow the finish to dry properly.
Yellowing or darkening of the oil finish is another common concern, particularly with linseed oil. This can occur over time due to exposure to sunlight or oxidation.
To minimize yellowing, avoid exposing the guitar to direct sunlight and consider using a tung oil finish, which is less prone to yellowing. If yellowing does occur, you can try lightly sanding the surface and applying a fresh coat of oil.
Addressing these common issues promptly and effectively will help you maintain the beauty and integrity of your oil based guitar finish. With proper care and attention, you can enjoy a stunning and durable finish that enhances the natural characteristics of the wood.
Safety Precautions When Working with Guitar Finishing Oils
Working with guitar finishing oils requires adherence to strict safety precautions to protect your health and prevent accidents. Many finishing oils contain solvents and other chemicals that can be harmful if inhaled, ingested, or come into contact with skin.
Always work in a well-ventilated area to minimize exposure to fumes. If adequate ventilation is not possible, wear a respirator or mask designed to filter out organic vapors.
Wear gloves to protect your skin from contact with the oil. Some individuals may be sensitive or allergic to certain oils or solvents, and prolonged exposure can cause irritation or dermatitis.
Avoid getting oil in your eyes. If contact occurs, flush your eyes with water for at least 15 minutes and seek medical attention.
Keep finishing oils away from heat, sparks, and open flames. Many finishing oils are flammable, and their vapors can ignite easily.
Properly dispose of oil-soaked rags and applicators. Oil-soaked rags can spontaneously combust if not handled correctly. The best way to dispose of them is to lay them flat to dry in a well-ventilated area or to store them in a sealed metal container filled with water.
Read and follow the manufacturer’s instructions and safety guidelines for each product you use. Understanding the specific hazards and precautions associated with each finishing oil is essential for ensuring your safety.
By taking these safety precautions, you can minimize the risks associated with working with guitar finishing oils and create a safe and healthy environment for your luthierie projects. Prioritizing safety will help you enjoy the process and achieve beautiful results without compromising your well-being.
Conclusion
Oil based guitar finishes offer a unique blend of aesthetic appeal, tactile feel, and ease of application that makes them a popular choice among luthiers and guitar enthusiasts. While they may not provide the same level of protection as synthetic finishes, their natural beauty and ease of maintenance make them a worthwhile option for many instruments.
By understanding the benefits and drawbacks of oil based finishes, selecting the right oil for your project, and following proper application and maintenance techniques, you can achieve a stunning and durable finish that enhances the natural characteristics of the wood. The oil based guitar finish is a testament to the enduring appeal of traditional luthierie methods.