A flawless guitar finish is a thing of beauty. It protects the wood, enhances its appearance, and contributes to the instrument’s overall tone.
But, like any surface, a guitar finish is susceptible to damage from everyday use.
Scratches, dents, and other imperfections can detract from your guitar’s aesthetic appeal and potentially affect its value. Luckily, finish repair is possible, and in many cases, it’s a DIY job.
This article will guide you through the process of guitar finish repair, covering everything from identifying the type of damage to the techniques and tools needed to restore your instrument’s luster. With the right approach, you can bring your guitar back to its former glory and protect it from future harm using these guitar finish repair methods.
Identifying the Type of Damage to Your Guitar Finish
Before you start any repair work, it’s essential to accurately assess the type and extent of the damage. Different types of damage require different repair techniques. Knowing what you’re dealing with is half the battle in guitar finish repair.
The main types of finish damage are scratches, swirl marks, dents, chips, and cracks. Scratches are shallow lines on the surface of the finish, often caused by picking, cleaning, or contact with abrasive materials. Swirl marks are circular scratches that appear as a hazy pattern, usually from improper polishing.
Dents are depressions in the finish caused by impacts, while chips are small pieces of finish that have broken away. Cracks are fractures in the finish, which can range from hairline cracks to more significant splits. Understanding the specific type of damage is crucial for choosing the right repair method for your guitar finish repair project.
Another important factor is the type of finish itself. The two main types of guitar finishes are lacquer and polyurethane. Lacquer finishes are thinner and more delicate, while polyurethane finishes are thicker and more durable. The finish type dictates the appropriate repair products and techniques.
Careful examination under good lighting is crucial. Use a magnifying glass to get a closer look at the damage. This will help you determine the depth and severity of the imperfections, guiding your repair strategy.
Consider the age of the guitar as well. Older finishes may react differently to repair products than newer ones. Understanding the history of the instrument can inform your repair decisions.
For instance, a vintage guitar with a nitrocellulose lacquer finish requires a different approach than a modern guitar with a polyurethane finish. Nitrocellulose is more prone to cracking and checking over time. Therefore, repairs must be done with compatible materials and techniques to avoid further damage.
Furthermore, the location of the damage matters. Damage on the neck might require more careful consideration due to playability concerns. Repairs in high-wear areas may need extra protection to prevent future damage.
Finally, don’t underestimate the importance of cleaning the area before assessing the damage. Dirt and grime can obscure the true extent of the problem. A clean surface will provide a clearer picture of what you’re dealing with.
Essential Tools and Materials for Guitar Finish Repair
Having the right tools and materials is crucial for achieving professional-looking results in guitar finish repair. Using the wrong products or tools can cause further damage or lead to a less-than-satisfactory repair. Invest in quality tools for a quality guitar finish repair.
For minor scratches and swirl marks, you’ll need polishing compounds, such as swirl removers and fine-cut polishes. These compounds contain abrasives that gently remove the damaged layer of finish, restoring its smoothness and shine. You’ll also need soft polishing cloths, preferably microfiber cloths, to apply and buff the compounds.
For deeper scratches, dents, and chips, you may need more specialized materials. These include finish fillers, such as lacquer sticks or cyanoacrylate (CA) glue, to fill in the damaged areas. You’ll also need a razor blade or scraper to level the filler with the surrounding finish, as well as sandpaper in various grits to smooth and refine the repair.
For spot repairs of larger areas, you may need to spray lacquer or polyurethane, depending on the original finish. You’ll also need masking tape and paper to protect the surrounding areas from overspray, as well as a spray gun or aerosol can for applying the finish. Don’t forget safety gear, such as a respirator and gloves, to protect yourself from harmful fumes and chemicals during your guitar finish repair.
A well-lit workspace is also essential. Proper lighting allows you to see the imperfections clearly and monitor your progress effectively. Consider using a task light or magnifying lamp for detailed work.
In addition to polishing cloths, consider investing in polishing pads for use with a power buffer. Power buffers can speed up the polishing process and provide a more consistent finish. However, they require practice and caution to avoid burning through the finish.
When selecting sandpaper, choose high-quality automotive sandpaper in a range of grits, from coarse to ultra-fine. Wet sanding is often recommended for finish repair, as it helps to reduce friction and prevent clogging. Always use a sanding block to ensure a flat, even surface.
For applying finish fillers, consider using a set of micro applicators or toothpicks. These tools allow for precise application of the filler material into small dents and chips. Avoid using excessive amounts of filler, as this can make the leveling process more difficult.
Finally, don’t forget about the importance of patience. Guitar finish repair can be a time-consuming process, and rushing can lead to mistakes. Take your time, follow the instructions carefully, and don’t be afraid to seek help from experienced guitarists or luthiers if you’re unsure about any step.
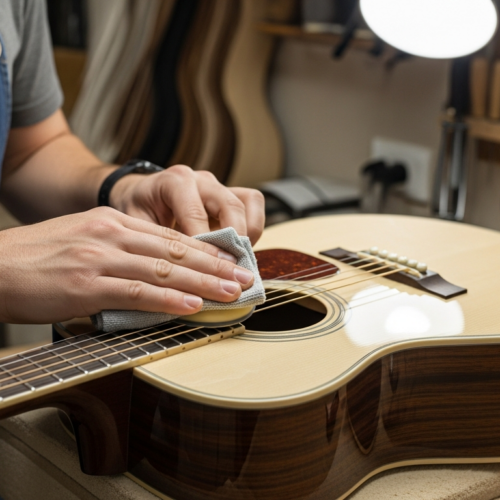
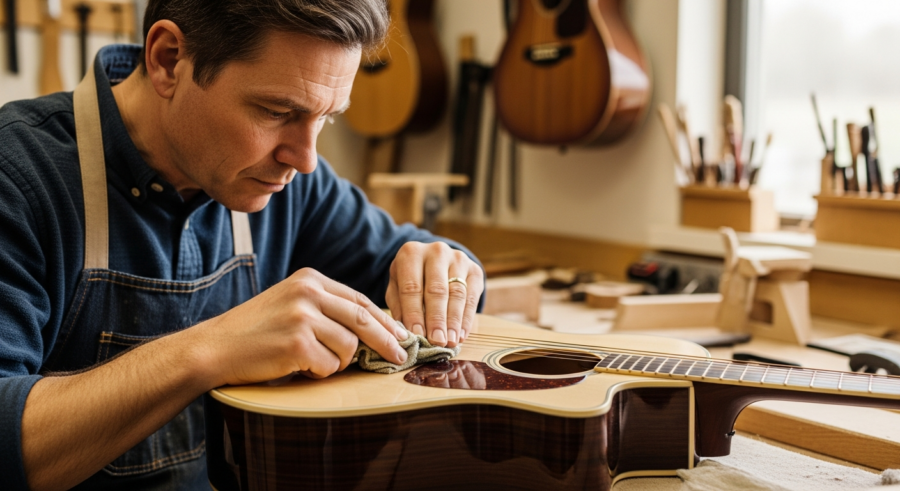
Repairing Minor Scratches and Swirl Marks
Minor scratches and swirl marks are the most common type of finish damage on guitars. Fortunately, they’re also the easiest to repair. With a few simple steps and the right materials, you can restore your guitar’s finish to its original shine using these scratch repair techniques.
Start by cleaning the area around the scratch or swirl marks with a clean, damp cloth. This will remove any dirt, dust, or grime that could interfere with the polishing process. Make sure the area is completely dry before proceeding with guitar finish repair.
| Compound | Abrasiveness | Use |
|---|---|---|
| Swirl Remover | Mild | Removes swirl marks and light scratches |
| Fine-Cut Polish | Medium | Removes deeper scratches and imperfections |
| Buffing Compound | Aggressive | Levels the finish and removes orange peel |
| Glaze | Non-abrasive | Enhances shine and protects the finish |
Next, apply a small amount of swirl remover or fine-cut polish to a soft polishing cloth. Gently rub the compound over the scratched or swirled area, using a circular motion. Apply moderate pressure and work the compound into the finish for several minutes.
After polishing, wipe away any residue with a clean section of the cloth. Inspect the area to see if the scratches or swirl marks have been removed. If necessary, repeat the polishing process until the finish is clear and smooth as part of your guitar finish repair.
Before applying any compound, consider using detailing spray. This helps to lubricate the surface and prevent the polishing cloth from scratching the finish further. Apply a light mist of detailing spray to the area before polishing.
When polishing, use a figure-eight motion rather than a circular motion. This helps to distribute the compound evenly and prevent swirl marks from forming. Overlap each pass slightly to ensure complete coverage.
After polishing with a compound, consider using a glaze or wax to protect the finish. Glazes and waxes fill in any remaining micro-scratches and provide a protective layer against future damage. Apply a thin, even coat of glaze or wax with a clean applicator pad.
Buff off the glaze or wax with a clean microfiber cloth. Use a gentle, circular motion to remove any excess product. Inspect the finish under good lighting to ensure that it is clear and smooth.
For particularly stubborn scratches, you may need to use a more aggressive polishing compound. However, be careful not to use too much pressure or polish for too long, as this can damage the finish. Start with the least aggressive compound possible and work your way up as needed.
Filling Dents and Chips in the Finish
Dents and chips in the finish are more serious types of damage that require a different approach than scratches or swirl marks. Filling the damaged area with a suitable material is essential to restore the finish’s integrity and appearance. This process requires patience and precision for a seamless repair.
Before filling the dent or chip, clean the area thoroughly with a mild cleaner. This will remove any loose particles or contaminants that could prevent the filler from adhering properly. Ensure the area is completely dry before proceeding with the filling process for your guitar finish repair.
For small dents or chips, you can use a lacquer stick or cyanoacrylate (CA) glue. Lacquer sticks are wax-like sticks of colored lacquer that can be melted and applied to the damaged area. CA glue, also known as super glue, is a fast-drying adhesive that can be built up in layers to fill the dent or chip.
When using a lacquer stick, heat the tip of the stick with a heat gun or lighter until the lacquer softens. Apply the softened lacquer to the dent or chip, filling it slightly above the level of the surrounding finish. Allow the lacquer to cool and harden completely before proceeding with the next step of guitar finish repair.
When using CA glue, apply a small drop of glue to the dent or chip, allowing it to flow into the damaged area. Build up the glue in thin layers, allowing each layer to dry completely before applying the next. This will prevent the glue from running or creating bubbles.
For larger chips, consider using a two-part epoxy filler. Epoxy fillers are more durable and can be sanded and shaped to match the surrounding finish. Mix the epoxy filler according to the manufacturer’s instructions and apply it to the chip with a small spatula or applicator.
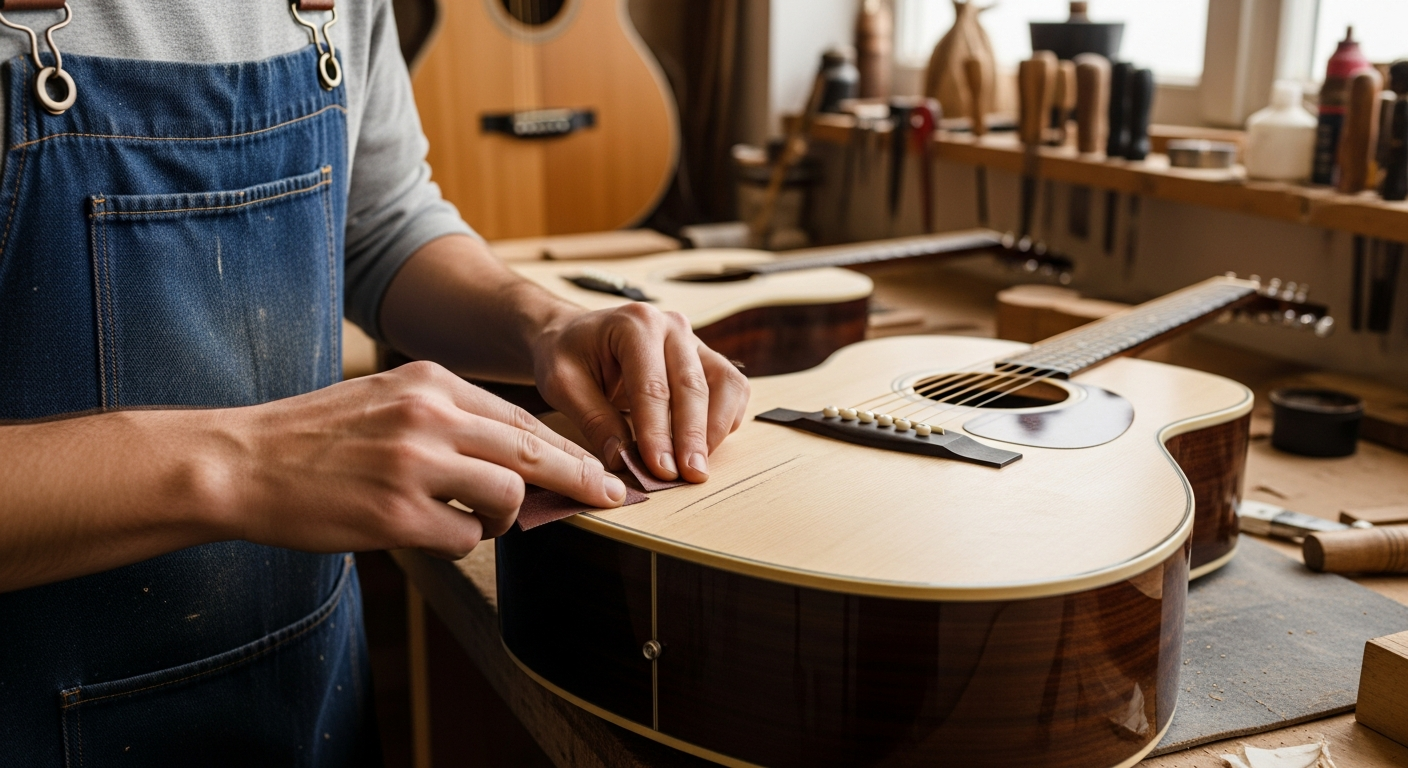
Allow the epoxy filler to cure completely before sanding it down. Use a sanding block and progressively finer grits of sandpaper to level the filler with the surrounding finish. Be careful not to sand through the original finish.
After sanding, polish the area with a polishing compound to restore the shine. Use a soft polishing cloth and a gentle, circular motion to blend the repair seamlessly with the surrounding finish. Inspect the repair under good lighting to ensure that it is smooth and even.
For color matching, you may need to tint the lacquer stick or epoxy filler to match the color of the original finish. Use specialized tints or pigments designed for use with lacquer or epoxy. Mix the tint carefully until you achieve a perfect match.
Finally, consider applying a clear coat over the filled area to protect the repair and enhance the shine. Use a spray can of clear lacquer or polyurethane, depending on the original finish. Apply several thin coats, allowing each coat to dry completely before applying the next.
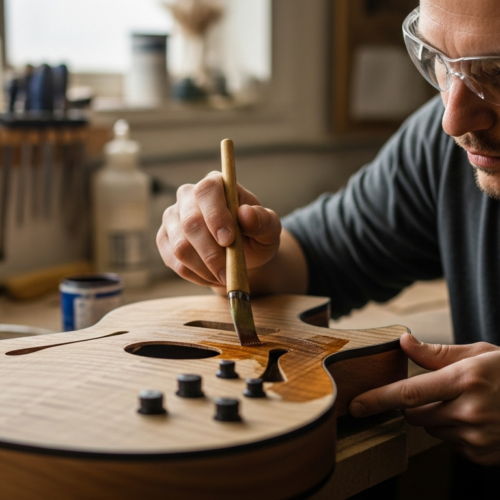
Spot Repairing Larger Areas of Damage
For larger areas of damage, such as significant scratches, cracks, or worn-through spots, a spot repair may be necessary. This involves applying new finish to the affected area, blending it seamlessly with the surrounding original finish. Spot repairs require more skill and equipment than simple scratch or dent repairs.
Start by preparing the area around the damage. Clean the area thoroughly and mask off the surrounding finish with tape and paper. This will protect the undamaged areas from overspray and ensure a clean, crisp repair line as part of your guitar finish repair.
- Clean the area thoroughly
- Mask off the surrounding finish
- Sand the damaged area smooth
- Apply several thin coats of finish
- Blend the new finish with the old
Next, sand the damaged area smooth with fine-grit sandpaper. This will create a smooth, even surface for the new finish to adhere to. Be careful not to sand through the original finish in the surrounding areas.
Apply several thin coats of lacquer or polyurethane to the sanded area, allowing each coat to dry completely before applying the next. Use a spray gun or aerosol can to apply the finish evenly and smoothly. Avoid applying too much finish at once, as this can cause runs or drips.
Before spraying, ensure that the temperature and humidity are within the recommended range for the finish you are using. Extreme temperatures or humidity can affect the drying time and the quality of the finish. Use a thermometer and hygrometer to monitor the conditions in your workspace.
When spraying, hold the spray gun or aerosol can at a consistent distance from the surface. Use a smooth, even motion to apply the finish. Overlap each pass slightly to ensure complete coverage. Avoid spraying in windy conditions, as this can cause the finish to dry unevenly.
After applying the final coat of finish, allow it to dry completely for at least 24 hours. Once the finish is dry, you can begin the blending process. Use a fine-grit sandpaper and a sanding block to gently level the new finish with the surrounding original finish.
Be careful not to sand through the original finish. After sanding, polish the area with a polishing compound to restore the shine. Use a soft polishing cloth and a gentle, circular motion to blend the repair seamlessly with the surrounding finish. Inspect the repair under good lighting to ensure that it is smooth and even.
For a perfect color match, you may need to tint the lacquer or polyurethane to match the color of the original finish. Use specialized tints or pigments designed for use with lacquer or polyurethane. Mix the tint carefully until you achieve a perfect match.
Preventing Future Finish Damage
Once you’ve repaired your guitar’s finish, it’s essential to take steps to prevent future damage. Proper care and maintenance can significantly extend the life of your finish and keep your guitar looking its best. Prevention is always better than cure when it comes to guitar finish repair.
One of the most important things you can do is to clean your guitar regularly. Wipe down the finish with a soft, clean cloth after each use to remove fingerprints, dust, and other contaminants. Use a guitar polish or cleaner specifically designed for your finish type to remove stubborn dirt or grime.
Avoid using harsh chemicals or abrasive cleaners, as these can damage the finish. When not in use, store your guitar in a case or gig bag to protect it from dust, scratches, and temperature changes. A case will also help prevent accidental bumps and dings.
Be mindful of your guitar’s environment. Avoid exposing it to extreme temperatures or humidity, as these can cause the finish to crack or peel. Keep your guitar away from direct sunlight, which can fade the finish over time. Use a humidifier in your guitar case to maintain a stable humidity level, especially in dry climates.
Consider using a guitar stand that is specifically designed to protect the finish. Some guitar stands can react with certain finishes, causing them to soften or discolor. Use a stand that is made of inert materials, such as wood or metal, with padding that is safe for guitar finishes.
When changing strings, be careful not to scratch the finish with the string ends or the string winder. Use a soft cloth to protect the finish around the bridge and headstock. Consider using a string winder with a built-in string cutter to avoid scratching the finish with the string ends.
Avoid wearing clothing or accessories that could scratch the finish. Belts, buckles, and jewelry can all cause scratches if they come into contact with the guitar. Consider wearing a soft shirt or using a guitar strap with padding to protect the finish.
If you’re traveling with your guitar, use a high-quality hard case that provides adequate protection. Consider using a case with a built-in hygrometer to monitor the humidity level inside the case. Avoid leaving your guitar in a car or other vehicle for extended periods of time, as this can expose it to extreme temperatures.
Finally, consider having your guitar professionally set up and maintained on a regular basis. A professional luthier can identify and address potential problems before they cause serious damage to the finish. They can also clean and polish the finish, ensuring that it stays in top condition.
Professional Guitar Finish Repair Services
While many minor finish repairs can be done at home, some types of damage are best left to a professional. If you’re dealing with extensive damage, a valuable instrument, or simply don’t feel comfortable doing the repair yourself, consider seeking professional help. A skilled luthier or guitar repair technician can restore your finish to its original condition.
Professional guitar finish repair services offer a range of solutions, from minor touch-ups to complete refinishing. They have the expertise, tools, and materials to handle even the most challenging repairs, ensuring a high-quality, long-lasting result. They can also match the original finish perfectly, preserving your guitar’s value and appearance.
When choosing a professional repair service, look for someone with experience and a good reputation. Ask for references and check online reviews to get an idea of their quality of work. Be sure to discuss the repair process and cost estimate upfront, so you know what to expect.
While professional repairs can be more expensive than DIY repairs, they’re often worth the investment, especially for valuable or sentimental instruments. A professional repair can restore your guitar’s finish to its original beauty and protect it from further damage. It will also give you peace of mind knowing that the repair was done correctly.
A reputable professional will also be able to advise you on the best course of action for your specific situation. They can assess the damage and provide you with a realistic estimate of the cost and time required for the repair. They can also explain the different repair options available and help you choose the one that is best suited to your needs.
When discussing the repair with a professional, be sure to ask about their experience with similar types of repairs. Ask to see examples of their previous work. A skilled technician will be able to demonstrate their expertise and provide you with confidence in their ability to restore your guitar’s finish.
Be wary of repair services that offer unrealistic promises or prices that seem too good to be true. A high-quality finish repair requires skill, time, and expensive materials. A reputable professional will charge a fair price for their services, reflecting the quality of their work.
Before entrusting your guitar to a repair service, be sure to get a written estimate that outlines the scope of the repair, the materials to be used, and the total cost. Read the estimate carefully and ask any questions you may have before signing it. This will help to avoid any misunderstandings or surprises down the road.
Finally, be sure to check the repair service’s insurance coverage. Make sure that they have adequate insurance to cover any damage that may occur to your guitar while it is in their possession. This will protect you in the event of an accident or other unforeseen circumstances.
DIY vs. Professional Repair: Which Is Right for You?
Deciding whether to tackle a guitar finish repair yourself or hire a professional depends on several factors. Consider your skill level, the extent of the damage, the value of your instrument, and your budget. Weighing these factors will help you make the best decision for your situation and your guitar finish repair.
DIY repairs are a good option for minor scratches, swirl marks, and small dents or chips. These types of repairs can be done with basic tools and materials, and there are many online tutorials and resources to guide you through the process. DIY repairs can save you money and give you a sense of accomplishment.
However, DIY repairs also come with risks. If you’re not careful, you could make the damage worse or end up with a less-than-satisfactory result. It’s essential to research the repair process thoroughly and practice on a scrap piece of wood before working on your guitar. Take your time and be patient, and don’t be afraid to seek advice from experienced guitarists or luthiers.
Professional repairs are a better choice for more extensive damage, such as large cracks, worn-through areas, or finish discoloration. These types of repairs require specialized tools, materials, and expertise. Professional repairs can be more expensive, but they offer a higher level of quality and guarantee. They also protect the value of your instrument and ensure a long-lasting repair.
Consider the value of your guitar when making your decision. If you have a valuable vintage instrument, it’s generally best to leave the repairs to a professional. A professional repair will help to preserve the value of the guitar and ensure that it is restored to its original condition. DIY repairs on valuable instruments can potentially decrease their value if not done correctly.
Assess your own skill level honestly. If you have no experience with finish repair, it’s best to start with a simple project on a less valuable instrument. Practice your techniques and build your confidence before attempting a more complex repair on your prized guitar. There are many online resources and tutorials that can help you learn the basics of finish repair.
Think about the time commitment involved. DIY repairs can be time-consuming, especially if you’re learning as you go. Professional repairs may take longer, but you can be assured that the job will be done correctly and efficiently. Consider your own schedule and how much time you’re willing to dedicate to the repair process.
Factor in the cost of tools and materials. DIY repairs may seem less expensive at first, but the cost of tools and materials can add up quickly. Professional repair services already have the necessary tools and materials on hand, so you won’t have to worry about purchasing them yourself. Compare the cost of DIY repairs with the cost of professional repairs to determine which option is more cost-effective for you.
Ultimately, the decision of whether to DIY or hire a professional depends on your individual circumstances and preferences. Carefully weigh the pros and cons of each option before making your final decision. Choose the option that will provide you with the best results and the most peace of mind.
Conclusion
Repairing guitar finishes is a skill that can save you money and keep your instrument looking its best. Whether you choose to tackle minor repairs yourself or seek professional help for more extensive damage, understanding the basics of finish repair is essential.
By following the tips and techniques outlined in this article, you can restore your guitar’s finish to its former glory and protect it from future harm. With proper care and maintenance, your guitar will continue to look and sound great for years to come using these guitar finish repair methods.
Remember that patience and attention to detail are key to achieving successful finish repairs. Take your time, follow the instructions carefully, and don’t be afraid to seek help from experienced guitarists or luthiers if you’re unsure about any step. With practice and perseverance, you can master the art of guitar finish repair and keep your instrument looking its best for years to come.
Investing in the right tools and materials is also essential for achieving professional-looking results. Don’t skimp on quality when it comes to polishing compounds, sandpaper, and other supplies. High-quality materials will make the repair process easier and more effective, and they will help to protect your guitar’s finish from further damage.
Regular cleaning and maintenance are crucial for preventing future finish damage. Wipe down your guitar after each use with a soft, clean cloth to remove fingerprints, dust, and other contaminants. Use a guitar polish or cleaner specifically designed for your finish type to remove stubborn dirt or grime. Avoid using harsh chemicals or abrasive cleaners, as these can damage the finish.
Finally, remember that guitar finish repair is an ongoing process. Even with the best care and maintenance, your guitar’s finish will inevitably accumulate some wear and tear over time. Be prepared to touch up minor scratches and swirl marks as needed to keep your guitar looking its best. With a little bit of effort, you can keep your guitar looking like new for years to come.