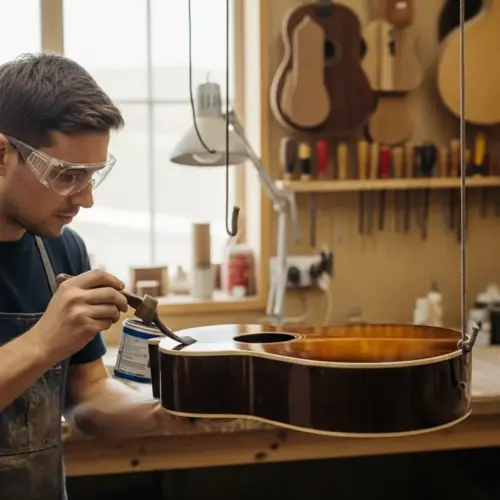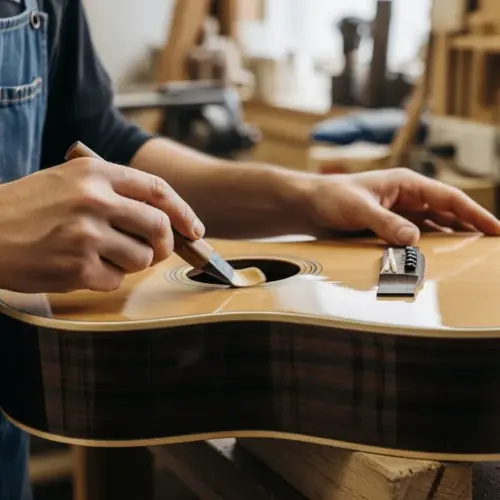

Achieving a flawless finish on a guitar is an art, but it’s also a science. One critical aspect often overlooked is guitar finish compatibility, the ability of different finish types to coexist and bond properly.
When incompatible finishes are layered, the results can be disastrous, ranging from clouding and cracking to complete delamination. Understanding the nuances of finish compatibility is essential for any luthier or guitar refinisher aiming for professional-quality results.
This article will serve as a comprehensive guide, exploring the dos and don’ts of finish combinations. We’ll cover everything from identifying compatible pairings to troubleshooting common issues, ensuring your next guitar finish is a resounding success.
Understanding Finish Compatibility: Why It Matters
Finish compatibility is about more than just aesthetics, it’s about the long-term integrity of the instrument. A finish that doesn’t properly adhere can lead to a host of problems down the road.
These problems include cracking, bubbling, peeling, and hazing, all of which can detract from the guitar’s appearance and even affect its sound. A stable, well-bonded finish, on the other hand, protects the wood, enhances its natural beauty, and contributes to the instrument’s overall resonance.
The chemical properties of different finish types play a crucial role in their compatibility. Some finishes, like nitrocellulose lacquer, bond to previous coats by partially dissolving them, creating a homogenous layer.
Others, such as polyurethane, form a hard, non-reactive film that relies on mechanical adhesion. When these fundamentally different finishes are combined, they may not bond correctly, leading to the aforementioned issues.
The finish protects the wood from moisture and environmental changes. This protection is crucial for maintaining the stability of the wood and preventing warping or cracking.
A well-applied and compatible finish can also enhance the tonal qualities of the guitar. Different finishes can affect the way the wood vibrates, influencing the instrument’s overall sound.
Therefore, selecting a compatible finish is not just about aesthetics, but also about preserving the structural integrity and sonic characteristics of the guitar. Understanding the science behind finish compatibility is paramount for any serious luthier or guitar enthusiast.
Consider the expansion and contraction rates of different materials. Wood and finish expand and contract at different rates with changes in temperature and humidity.
If the finish is too rigid and doesn’t allow for the wood’s natural movement, it can lead to stress and cracking. Choosing a finish that is flexible enough to accommodate the wood’s movement is crucial for long-term stability.
Compatible Finish Combinations: A Guide
Certain finish combinations are known to work well together, offering reliable results for luthiers. Understanding these pairings can save time, money, and frustration.
One of the safest and most common combinations is using different types of lacquer. Nitrocellulose lacquer over acrylic lacquer is generally acceptable, as both are solvent-based and tend to meld together well.
Shellac is another versatile option, often used as a sealer coat under various finishes. It adheres well to wood and provides a stable base for both solvent and water-based topcoats.
However, it’s important to de-wax the shellac if you intend to apply a water-based finish over it, as the wax can interfere with adhesion. Water-based lacquer over shellac can create a very nice finish, but only if the shellac is prepared correctly.
When using lacquer, it’s best to stick with the same type of thinner for all coats. This ensures consistent drying times and prevents compatibility issues between different layers of the finish.
Consider using a vinyl sealer under lacquer for added protection and improved adhesion. Vinyl sealers create a flexible barrier between the wood and the lacquer, preventing the finish from sinking into the grain and improving its overall durability.
When applying shellac, use a high-quality brush or spray gun to ensure a smooth, even coat. Avoid applying shellac too thickly, as this can lead to cracking and other problems.
For water-based finishes, make sure the wood is properly sealed to prevent the finish from raising the grain. Water-based finishes can cause the wood fibers to swell, resulting in a rough surface.
Sealing the wood before applying the finish will help to minimize this effect and create a smoother, more professional-looking result. Always test your finish combinations on scrap wood before applying them to the guitar.
Incompatible Finish Combinations: What to Avoid
Just as some finishes play nicely together, others are a recipe for disaster. Knowing which combinations to avoid is just as important as knowing which ones to use.
One of the most common mistakes is applying a hard, inflexible finish over a softer one. Polyurethane over lacquer, for example, is almost guaranteed to cause problems.
| Base Coat | Top Coat | Compatibility |
|---|---|---|
| Nitrocellulose Lacquer | Polyurethane | Incompatible |
| Acrylic Lacquer | Nitrocellulose Lacquer | Compatible |
| Shellac | Nitrocellulose Lacquer | Compatible |
| Oil-Based Varnish | Water-Based Lacquer | Incompatible |
| Water-Based Stain | Water-Based Lacquer | Compatible |
| Polyurethane | Nitrocellulose Lacquer | Incompatible |
The rigid polyurethane doesn’t allow the more flexible lacquer to expand and contract with temperature and humidity changes, leading to cracking. Similarly, applying any hard finish over oil-based varnish is likely to result in adhesion issues.
Another problematic combination is applying a solvent-based finish over a water-based one without proper sealing. The solvents in the topcoat can penetrate and disrupt the water-based base coat, causing lifting, bubbling, or discoloration.
Never apply lacquer over wax. The wax will prevent the lacquer from adhering properly, resulting in a finish that peels and flakes.
Avoid applying epoxy finishes over other types of finishes. Epoxy finishes are very hard and inflexible, and they don’t bond well to most other materials.
Be wary of applying water-based finishes over oil-based stains without proper sealing. The oil in the stain can prevent the water-based finish from adhering correctly.
It’s generally not a good idea to apply different brands of the same type of finish without testing for compatibility. Different brands may have different formulations that can cause compatibility issues.
Always research and understand the properties of each finish type before attempting to combine them. A little knowledge can go a long way in preventing costly mistakes.
Considering the Guitar’s History
When refinishing a guitar, it’s crucial to know what kind of finish was originally applied. This information can be difficult to obtain, but it’s essential for choosing compatible products.
If the original finish is unknown, it’s generally best to err on the side of caution and use a compatible finish system. One option is to completely remove the old finish and start fresh, which is often the most reliable approach.
However, if removing the old finish isn’t feasible, you can perform a series of tests to determine its type. Start by applying a small amount of different solvents, such as lacquer thinner, alcohol, and acetone, to inconspicuous areas.
Observe how the finish reacts to each solvent; some finishes will dissolve or soften, while others will remain unaffected. This can provide clues about the original finish’s composition and help you select a compatible topcoat.
Document your findings carefully. Keep a record of the solvents you tested and how the finish reacted to each one.
Take photographs of the test areas before and after applying the solvents. This will help you to compare the results and make an informed decision.
If possible, consult with a professional luthier or guitar refinisher. They may have experience with identifying different types of finishes and can offer valuable advice.
Remember that the age of the guitar can also affect the finish’s properties. Older finishes may have become brittle or oxidized, which can make them more difficult to identify and work with.
When in doubt, it’s always best to proceed with caution and test your finish combinations thoroughly before applying them to the entire guitar. Patience and careful observation are key to success.
Testing Finish Compatibility Before Application
Even with careful planning, it’s always wise to test finish compatibility before committing to a full application. This simple step can save you from costly mistakes and ensure a professional-looking result.
Find an inconspicuous area on the guitar, such as inside the control cavity or under the pickguard, to perform your test. Apply the base coat as you normally would, following the manufacturer’s instructions for drying time and application technique.
Once the base coat is fully cured, apply a small amount of the topcoat over it. Observe the area closely for any signs of incompatibility, such as lifting, wrinkling, clouding, or discoloration.
Allow the topcoat to fully cure, then inspect the area again. If you notice any adhesion issues or other problems, it’s a clear indication that the two finishes are not compatible and you should explore alternative options.
Document the entire testing process with photos and detailed notes. Record the dates, times, products used, and any observations you make.
Use a consistent application technique for both the base coat and the topcoat. This will help to ensure that your test results are accurate and reliable.
Pay close attention to the drying times of each finish. Incompatible finishes may take longer to dry or may never fully cure.
Test the finish in a variety of environmental conditions. Temperature and humidity can affect the compatibility of different finishes.
If you’re unsure about the compatibility of two finishes, consult with a professional luthier or guitar refinisher. They can offer valuable advice and guidance.
Troubleshooting Compatibility Issues
Despite your best efforts, compatibility issues can sometimes arise. Knowing how to troubleshoot these problems can help you salvage a project and avoid further damage.
If you notice incompatibility signs shortly after applying the topcoat, your best course of action is usually to remove it immediately. Use a solvent that’s appropriate for the topcoat, such as lacquer thinner or acetone, and gently wipe away the offending finish.
- Complete removal of incompatible finishes
- Careful surface preparation
- Use of a barrier coat
- Selecting compatible products
- Patience during application and curing
Be careful not to damage the base coat in the process, and allow it to fully dry before attempting another finish. If the incompatibility issues appear later, after the topcoat has fully cured, the situation is more complex.
If removing the finish, work in a well-ventilated area and wear appropriate safety gear, such as gloves and a respirator. Protect yourself from harmful chemicals.
Neutralize the surface after removing the incompatible finish. This will help to prevent any further reactions between the old finish and the new finish.
Consider using a specialized adhesion promoter to improve the bond between the base coat and the topcoat. These products can help to overcome minor compatibility issues.
If the incompatibility is severe, you may need to strip the guitar down to bare wood and start over. This is a time-consuming process, but it may be the only way to achieve a flawless finish.
Don’t be afraid to seek professional help. A qualified luthier or guitar refinisher can diagnose the problem and recommend the best course of action.
Dealing with Cracking and Crazing
Cracking and crazing are common signs of finish incompatibility, often appearing as fine lines or spiderweb patterns on the surface. These issues can be caused by applying a hard finish over a softer one, or by rapid changes in temperature and humidity.
In some cases, minor cracking can be addressed by carefully sanding the affected area and applying a fresh coat of compatible finish. However, if the cracking is severe or widespread, it may be necessary to completely remove the old finish and start over.
When dealing with crazing, it’s important to identify the underlying cause. If the crazing is due to finish incompatibility, simply applying more of the same finish will only exacerbate the problem.
Instead, you’ll need to remove the incompatible finish and apply a compatible system that’s designed to withstand the environmental conditions in your area. Remember that guitar finish compatibility is key to a long lasting and beautiful instrument.
Control the humidity in your workspace. High humidity can exacerbate cracking and crazing.
Use a flexible finish that can accommodate the wood’s natural movement. This will help to prevent cracking and crazing.
Apply the finish in thin, even coats. Thick coats of finish are more prone to cracking and crazing.
Allow the finish to fully cure before handling the guitar. This will give the finish time to harden and become more resistant to cracking and crazing.
Protect the guitar from extreme temperature changes. Rapid temperature changes can cause the finish to crack and craze.
Preparing a Surface for a Different Finish
When switching from one finish type to another, proper surface preparation is essential for ensuring good adhesion. This involves cleaning, sanding, and sometimes applying a barrier coat.
Start by thoroughly cleaning the surface with a wax and grease remover to remove any contaminants that could interfere with adhesion. Next, sand the surface to create a mechanical bond for the new finish.
The grit of sandpaper you use will depend on the existing finish and the type of finish you’re applying. For most situations, starting with 320-grit sandpaper and working your way up to 400-grit is a good approach.
If you’re applying a water-based finish over an oil-based one, consider using a barrier coat to prevent any potential compatibility issues. Shellac is often used as a barrier coat, but make sure to de-wax it before applying the water-based finish.
Ensure the surface is completely dry before applying any new finish. Moisture can interfere with adhesion and cause problems down the road.
Use a tack cloth to remove any dust or debris from the surface after sanding. This will help to ensure a smooth, even finish.
Consider using a sanding sealer to fill the pores of the wood and create a smooth surface for the finish. This is especially important for open-grained woods like mahogany and ash.
If you’re applying a tinted finish, make sure to apply it evenly to avoid blotching. Practice your technique on scrap wood before applying it to the guitar.
Always follow the manufacturer’s instructions for surface preparation. They may have specific recommendations for their products.
The Role of Sealers and Primers
Sealers and primers play a vital role in promoting finish compatibility and ensuring a smooth, even surface. They act as a bridge between the wood and the topcoat, improving adhesion and preventing the finish from sinking into the grain.
A good sealer will also help to highlight the natural beauty of the wood, enhancing its grain and color. When choosing a sealer, it’s important to select one that’s compatible with both the wood and the topcoat.
For example, if you’re using a nitrocellulose lacquer topcoat, a nitrocellulose-based sealer is a good choice. Similarly, if you’re using a water-based lacquer, a water-based sealer is recommended.
Apply the sealer in thin, even coats, following the manufacturer’s instructions for drying time and application technique. Once the sealer is fully cured, lightly sand it with fine-grit sandpaper to create a smooth surface for the topcoat.
Choose a sealer that is specifically designed for use with guitars. These sealers are formulated to provide the best possible adhesion and protection for the wood.
Consider using a sanding sealer to fill the pores of the wood and create a smooth surface for the finish. This is especially important for open-grained woods like mahogany and ash.
If you’re applying a tinted finish, make sure to apply the sealer evenly to avoid blotching. Practice your technique on scrap wood before applying it to the guitar.
Always follow the manufacturer’s instructions for applying the sealer. They may have specific recommendations for their products.
Allow the sealer to fully cure before applying the topcoat. This will help to ensure that the finish adheres properly and provides the best possible protection for the wood.
Conclusion
Guitar finish compatibility is a complex topic, but understanding the basics can save you a lot of headaches. By choosing compatible finish combinations, preparing surfaces properly, and testing before committing, you can achieve professional-quality results.
Remember to consider the guitar’s history, the properties of different finish types, and the environmental conditions in your area. With careful planning and attention to detail, you can ensure that your next guitar finish is not only beautiful but also durable and long-lasting. Always prioritize guitar finish compatibility for optimal results.
The key takeaway is to always research and test. Don’t assume that two finishes will be compatible just because they are both lacquers or water-based.
Consult with experienced luthiers or refinishers. Their knowledge and expertise can be invaluable in avoiding costly mistakes.
Invest in high-quality finishing products. Cheaper products may not be as reliable or compatible as more expensive ones.
Practice patience and attention to detail. Finishing a guitar is a time-consuming process that requires careful attention to detail.
By following these guidelines, you can increase your chances of achieving a beautiful and durable finish that will protect your guitar for years to come. Always remember guitar finish compatibility.