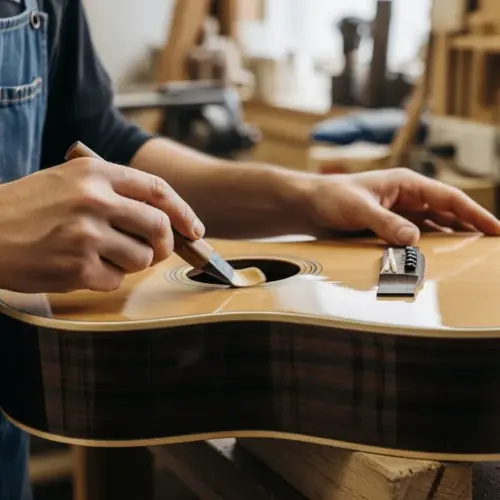


Achieving a flawless finish on a guitar is a goal for many luthiers and hobbyists. Unfortunately, a common problem that can ruin an otherwise perfect finish is fisheye. Fisheye appears as small, crater-like depressions in the finish, making the surface look uneven and unprofessional.
Understanding the causes of guitar finish fisheye and how to prevent or repair it is essential for achieving a smooth, glossy surface. This article explores the various aspects of finish fisheye, including identification, prevention, and repair techniques, to help you get a flawless guitar finish.
Whether you’re a seasoned luthier or just starting out, mastering the art of eliminating guitar finish fisheye will elevate the quality of your instruments. By understanding the science behind surface contamination and employing the right strategies, you can ensure that your guitar finishes are smooth, durable, and visually appealing.
Understanding Fisheye: Causes and Prevention
Fisheye is a frustrating defect that occurs when the guitar finish retracts from certain areas, leaving small, circular depressions. These imperfections are caused by surface contamination, which prevents the finish from adhering properly to the wood.
The presence of contaminants disrupts the surface tension of the finish, causing it to pull away and create the characteristic fisheye appearance. Identifying and addressing the root causes of surface contamination is the first step in preventing fisheye in guitar finishes.
One of the primary causes of fisheye is the presence of silicone-based products. Silicone oils, waxes, and polishes are commonly used in woodworking and can easily transfer to the guitar’s surface.
Even small amounts of silicone can interfere with the finish’s ability to spread evenly, leading to fisheye. Other contaminants, such as oil from your skin, dust, and residue from cleaning products, can also contribute to the problem.
Fisheye is not just a cosmetic issue; it can also compromise the protective qualities of the finish. The craters expose the wood underneath to moisture and other environmental factors. This can lead to further damage over time, such as swelling, cracking, or even wood rot.

Understanding the science behind surface tension is crucial for preventing fisheye. Surface tension is the force that causes liquids to minimize their surface area, leading to the formation of droplets. When contaminants are present, they disrupt this surface tension, causing the finish to pull away from the contaminated areas.
Prevention is always better than cure when it comes to fisheye. Implementing a strict cleaning and preparation protocol can significantly reduce the risk of this defect. This includes thoroughly cleaning the wood surface, using appropriate solvents, and avoiding the use of silicone-based products in the finishing area.
Furthermore, controlling the environment in your workspace can also help prevent fisheye. Maintaining a consistent temperature and humidity level can ensure that the finish dries and cures properly. Proper ventilation is also essential for removing airborne contaminants that can settle on the surface of the guitar.
Identifying Contaminants That Cause Fisheye
Pinpointing the exact source of contamination can be challenging, but understanding common culprits is a great start. Silicone-based products are notorious for causing fisheye, and they can be found in various forms.
Furniture polishes, car waxes, and even some hand lotions contain silicone, which can easily transfer to your workbench and tools. Oil and grease are also common contaminants, especially in workshops where machinery is used.
Dust and airborne particles can settle on the surface of the guitar, introducing contaminants that disrupt the finish. Additionally, residue from cleaning products, such as solvents and detergents, can leave behind a film that interferes with adhesion.
Residue can be particularly problematic if the product isn’t fully removed before finishing. By identifying potential sources of contamination in your workspace, you can take steps to eliminate them and prevent fisheye.
Consider the entire process, from preparing the wood to applying the final coat of finish, as a potential source of contamination. Even seemingly harmless activities, such as wiping the guitar with a shop towel, can introduce contaminants if the towel is not clean.
Examine your tools and equipment for signs of contamination. Spray guns, brushes, and mixing containers can all harbor contaminants that can transfer to the finish. Clean your tools thoroughly after each use and store them in a clean, dust-free environment.
Pay attention to the products you use in your workshop, even if they are not directly related to finishing. Lubricants, adhesives, and other chemicals can contain ingredients that can cause fisheye. Store these products away from the finishing area and avoid using them near the guitar.
Sometimes, the source of contamination can be unexpected. For example, some types of wood can contain natural oils or resins that can interfere with the finish. In these cases, it may be necessary to seal the wood with a barrier coat before applying the finish.
Preparing the Surface to Prevent Fisheye
Thorough surface preparation is essential for preventing fisheye and ensuring a smooth, even finish. Start by carefully sanding the wood to create a clean, uniform surface.
Use progressively finer grits of sandpaper, ending with a grit appropriate for the type of finish you’re using. After sanding, remove all dust and debris from the surface.
| Preparation Step | Description | Why It Helps |
|---|---|---|
| Sanding | Use progressively finer grits of sandpaper. | Creates a smooth, uniform surface for better adhesion. |
| Dust Removal | Vacuum and wipe down the surface with a tack cloth. | Removes particles that can cause contamination. |
| Solvent Wipe | Wipe with a solvent like naphtha or denatured alcohol. | Removes oils, waxes, and other surface contaminants. |
| Tack Cloth | Use a tack cloth to pick up any remaining dust. | Ensures a completely clean surface. |
A vacuum cleaner with a soft brush attachment is effective for removing loose dust. Follow this with a tack cloth to pick up any remaining particles.
Next, wipe down the surface with a solvent such as naphtha or denatured alcohol. These solvents help remove oils, waxes, and other contaminants that may be present.
Consider using a specialized degreaser designed for wood finishing. These products are formulated to remove stubborn contaminants without damaging the wood. Always test the degreaser on a scrap piece of wood before applying it to the guitar.
If you suspect that the wood may contain natural oils or resins, consider applying a sealer before finishing. A sealer will create a barrier between the wood and the finish, preventing these substances from interfering with adhesion. Choose a sealer that is compatible with the finish you plan to use.
Pay attention to the edges and corners of the guitar, as these areas are often prone to contamination. Use a small brush or cotton swab to clean these areas thoroughly. Ensure that all surfaces are completely dry before applying the finish.
Proper surface preparation is not just about removing contaminants; it’s also about creating a surface that is conducive to adhesion. Sanding the wood creates microscopic scratches that provide a mechanical bond for the finish. Cleaning the surface removes any barriers that would prevent the finish from adhering properly.
Using Fisheye Reducer Additives
Fisheye reducer additives are designed to reduce surface tension and allow the finish to spread evenly, even in the presence of contaminants. These additives work by modifying the finish’s properties, making it more tolerant to surface imperfections.
However, it’s essential to use them sparingly and follow the manufacturer’s instructions carefully. Adding too much fisheye reducer can compromise the finish’s durability and appearance.
When using a fisheye reducer, start by adding a small amount to the finish and mixing thoroughly. Test the mixture on a scrap piece of wood to ensure it’s compatible and doesn’t cause any adverse effects.
If the fisheye persists, you can add a small amount more, but avoid exceeding the recommended concentration. Be aware that fisheye reducers may affect the finish’s gloss and clarity, so it’s essential to find the right balance between preventing fisheye and maintaining the desired aesthetic.
Understand that fisheye reducer additives are not a substitute for proper surface preparation. They should be used as a last resort, not as a way to compensate for poor cleaning or sanding. Always prioritize preventing contamination in the first place.
Different fisheye reducer additives are designed for different types of finishes. Make sure you choose an additive that is compatible with the finish you are using. Using the wrong additive can actually make the problem worse.
Be aware that fisheye reducer additives can sometimes affect the drying time of the finish. Monitor the drying process closely and adjust your schedule accordingly. It’s always a good idea to test the mixture on a scrap piece of wood to determine the drying time before applying it to the guitar.
Consider using a leveling agent in conjunction with a fisheye reducer. Leveling agents help the finish flow and level out, which can further reduce the appearance of fisheye. However, like fisheye reducers, leveling agents should be used sparingly and with caution.
Alternative Finishing Products
Some finishing products are more prone to fisheye than others. Nitrocellulose lacquer, for example, can be particularly sensitive to surface contamination. Consider using alternative finishes, such as water-based lacquers or polyurethane finishes, which are more resistant to fisheye.
Water-based lacquers are less likely to be affected by silicone and other contaminants. Polyurethane finishes create a durable, protective coating that is less susceptible to fisheye.
Experiment with different finishes to find one that works well in your environment and with your finishing techniques. Each type of finish has its own unique properties and application requirements.
Always follow the manufacturer’s instructions for surface preparation, mixing, and application. Proper application techniques can significantly reduce the risk of fisheye, regardless of the type of finish used.
Acrylic lacquers are another alternative to consider. They offer good durability and are less prone to yellowing than nitrocellulose lacquer. However, they may not have the same depth of gloss as nitrocellulose lacquer.
Shellac is a natural finish that is relatively easy to apply and repair. It is also less prone to fisheye than nitrocellulose lacquer. However, shellac is not as durable as other finishes and is susceptible to water damage.
Oil-based varnishes can also be used to finish guitars. They provide a warm, rich tone and are relatively durable. However, they can take a long time to dry and may require multiple coats.
When choosing a finish, consider the overall aesthetic you are trying to achieve. Each type of finish has its own unique look and feel. Experiment with different finishes to find one that suits your style.
Repairing Fisheye: Techniques for Restoration
If fisheye does occur, don’t panic; it can often be repaired. The first step is to identify the affected areas and assess the severity of the problem.
For minor fisheye, you may be able to sand down the affected area and reapply the finish. Use fine-grit sandpaper to carefully level the surface, being careful not to sand through the surrounding finish.
- Spot sanding the affected area
- Applying a thin coat of finish
- Using a leveling agent
- Complete stripping and refinishing
- Proper surface cleaning
After sanding, clean the area thoroughly to remove any dust or debris. Apply a thin coat of finish, using a brush or spray gun, and allow it to dry completely.
For more severe fisheye, you may need to strip the entire finish and start over. Use a chemical stripper to remove the existing finish, following the manufacturer’s instructions carefully.
If you choose to spot sand and reapply the finish, consider using a leveling agent to help the new finish blend seamlessly with the existing finish. A leveling agent will help the finish flow and level out, minimizing the appearance of the repair.
When stripping the finish, be sure to remove all traces of the old finish and any contaminants that may be present. Use a solvent to clean the wood thoroughly after stripping. Allow the wood to dry completely before applying a new finish.
If you suspect that the fisheye was caused by a specific contaminant, take steps to eliminate that contaminant before reapplying the finish. Otherwise, the fisheye may reappear.
Repairing fisheye can be a time-consuming and challenging process. However, with patience and attention to detail, you can restore the finish to its original beauty. Remember to always prioritize prevention by following proper surface preparation techniques.
Troubleshooting Fisheye Problems
Sometimes, despite your best efforts, fisheye can still occur. When troubleshooting fisheye problems, consider several factors that may be contributing to the issue.
The type of finish you’re using, the surface preparation techniques, and the environment in your workspace can all play a role. If you’re using a finish that is known to be sensitive to contamination, such as nitrocellulose lacquer, ensure that you’re taking extra precautions to prevent fisheye.
Double-check your surface preparation techniques to ensure that you’re thoroughly removing all dust, oil, and other contaminants. Consider using a different solvent or cleaning product to see if it makes a difference.
The temperature and humidity in your workspace can also affect the finish’s drying and leveling properties. Ensure that you’re working in a well-ventilated area with consistent temperature and humidity levels.
Consider the age of your finishing products. Old or expired finishes may not perform as well and may be more prone to fisheye. Always check the expiration date of your finishes before using them.
Examine your spray equipment for any potential problems. A clogged spray gun or a faulty air compressor can cause uneven application and increase the risk of fisheye. Clean and maintain your spray equipment regularly.
If you’re using a fisheye reducer, make sure you’re using the correct amount and that it’s properly mixed with the finish. Too much or too little fisheye reducer can both cause problems.
Sometimes, the problem may not be fisheye at all, but rather another type of finish defect that resembles fisheye. Consult with an experienced finisher or refer to a finishing guide to help you identify the problem and find the appropriate solution.
Maintaining a Clean Workspace
Keeping your workspace clean is paramount in preventing fisheye and other finish defects. Regularly clean your workbench, tools, and spray booth to remove dust, oil, and other contaminants.
Use dedicated rags and cleaning supplies for finishing tasks, and avoid using the same tools for other woodworking activities. Consider investing in an air filtration system to remove airborne particles that can settle on the surface of your guitar.
Store your finishing products in a clean, dry place, away from potential sources of contamination. Avoid using silicone-based products in your workspace altogether, if possible.
By implementing a strict cleaning protocol, you can minimize the risk of fisheye and ensure that your guitar finishes are smooth and flawless. A clean workspace is a happy workspace, especially when it comes to achieving professional-quality finishes.
Create a designated finishing area that is separate from other woodworking activities. This will help prevent dust and other contaminants from spreading to the finishing area. Consider using a spray booth to contain overspray and further reduce the risk of contamination.
Regularly vacuum or sweep the floor in your workspace to remove dust and debris. Use a damp cloth to wipe down surfaces, such as workbenches and shelves. Avoid using compressed air to blow dust off surfaces, as this can simply redistribute the dust into the air.
Consider using a tack cloth to wipe down the guitar before applying the finish. A tack cloth is a sticky cloth that is designed to pick up dust and other particles. Be sure to use a clean tack cloth each time you wipe down the guitar.
Wear clean clothing when finishing guitars. Avoid wearing clothing that is dusty or oily. Consider wearing a dedicated finishing apron to protect your clothing from overspray and contaminants.
Spraying Techniques to Minimize Fisheye
The way you apply the finish can also influence the likelihood of fisheye. When spraying, use a consistent and even spray pattern to avoid areas of excessive build-up or thin coverage.
Maintain the correct distance between the spray gun and the surface of the guitar, following the manufacturer’s recommendations. Overlapping each pass slightly can help ensure uniform coverage and prevent dry spots.
Adjust the spray gun’s settings to achieve the optimal atomization and flow rate for the finish you’re using. If the finish is too thick or the atomization is poor, it may not spread evenly, leading to fisheye.
Applying multiple thin coats of finish, rather than one thick coat, can also help reduce the risk of fisheye. Thin coats allow the finish to level properly and minimize the impact of any surface contaminants.
Practice your spraying technique on a scrap piece of wood before applying the finish to the guitar. This will help you get a feel for the spray gun and the finish. It will also allow you to adjust the spray gun’s settings to achieve the desired results.
When spraying, hold the spray gun perpendicular to the surface of the guitar. This will help ensure even coverage and prevent runs and sags. Move the spray gun in smooth, even strokes, overlapping each pass slightly.
Avoid spraying in windy or drafty conditions. Wind can cause the finish to dry unevenly and increase the risk of fisheye. If you must spray in windy conditions, consider using a spray booth or a windbreak.
If you notice any runs or sags in the finish, stop spraying immediately and allow the finish to dry. Once the finish is dry, you can sand down the runs and sags and reapply the finish.
Conclusion
Achieving a flawless guitar finish requires attention to detail and a thorough understanding of the factors that can cause defects like fisheye. By identifying and eliminating sources of contamination, preparing the surface properly, and using the right finishing products and techniques, you can minimize the risk of fisheye and achieve professional-quality results.
Remember to maintain a clean workspace, use fisheye reducer additives sparingly, and consider alternative finishes that are less susceptible to contamination. If fisheye does occur, don’t be afraid to repair it using spot sanding or complete stripping and refinishing techniques.
With practice and patience, you can master the art of eliminating guitar finish fisheye and create instruments that are both beautiful and durable. The key is to stay vigilant, pay attention to detail, and never compromise on cleanliness and surface preparation.
By following these guidelines, you’ll be well on your way to achieving flawless guitar finishes that showcase your craftsmanship and enhance the beauty of your instruments. Happy finishing, and may your guitars always shine!
The journey to a perfect finish is ongoing. Stay curious, keep learning, and don’t be afraid to experiment with new techniques and products. The more you learn about finishing, the better you’ll become at preventing and repairing fisheye.
Consider joining a luthier’s forum or online community to connect with other builders and share your experiences. You can learn a lot from other people’s successes and failures. You can also get valuable feedback on your own finishing techniques.
Remember that even the most experienced luthiers encounter fisheye from time to time. Don’t get discouraged if you experience this problem. The key is to learn from your mistakes and keep improving your skills.
Ultimately, the goal is to create guitars that are not only beautiful but also durable and long-lasting. By mastering the art of finishing, you can ensure that your instruments will be enjoyed for generations to come. So, embrace the challenge, and keep striving for perfection!