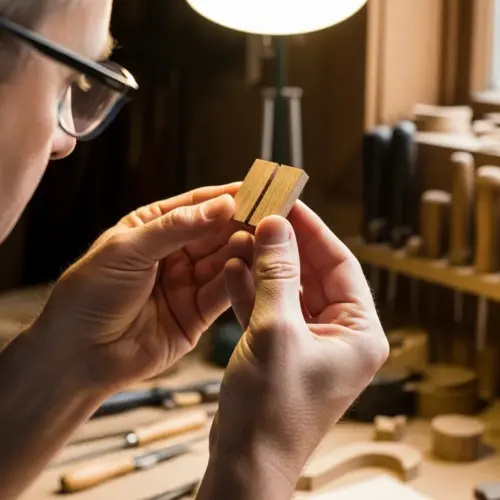


Rosette inlays are a beautiful and intricate detail that can elevate the appearance of any guitar. Among the many materials available for creating these inlays, ziricote stands out for its unique grain patterns and rich color variations. A ziricote rosette inlay can transform an instrument into a work of art.
This article explores the use of ziricote in rosette inlays, discussing its properties, cutting and shaping techniques, gluing and finishing processes, and tips for achieving a professional look. Whether you’re a seasoned luthier or a hobbyist, understanding how to work with ziricote can open up new possibilities for your guitar designs.
We will also cover combining ziricote with other materials to create stunning visual effects. With the right approach, a ziricote rosette inlay can become a signature element of your instrument, showcasing your craftsmanship and attention to detail. Let’s dive in and discover the beauty and versatility of ziricote for guitar rosettes.
Ziricote: Understanding its Unique Grain and Color
Ziricote is a hardwood native to Central America, particularly Mexico, Guatemala, and Belize. Its most striking feature is its highly varied grain pattern, often described as “spider-webbing” or “landscape” due to its resemblance to natural scenes.
The ziricote appearance is characterized by dark brown to black lines contrasting with lighter tan or golden-brown backgrounds. This dramatic contrast makes it highly sought after for decorative applications, including musical instruments.
Beyond its visual appeal, ziricote boasts excellent tonal properties. It is known for producing clear, bright tones with good sustain, making it a favorite among luthiers for back and sides of guitars.
The density and hardness of ziricote contribute to its stability and resistance to wear, essential qualities for a material used in musical instruments. Understanding these ziricote properties is key to appreciating its potential in creating beautiful and functional rosettes.
The unique grain patterns in ziricote are not just aesthetically pleasing; they also reflect the tree’s growth history and environmental conditions. Each piece of ziricote tells a story, making it a truly special material to work with.
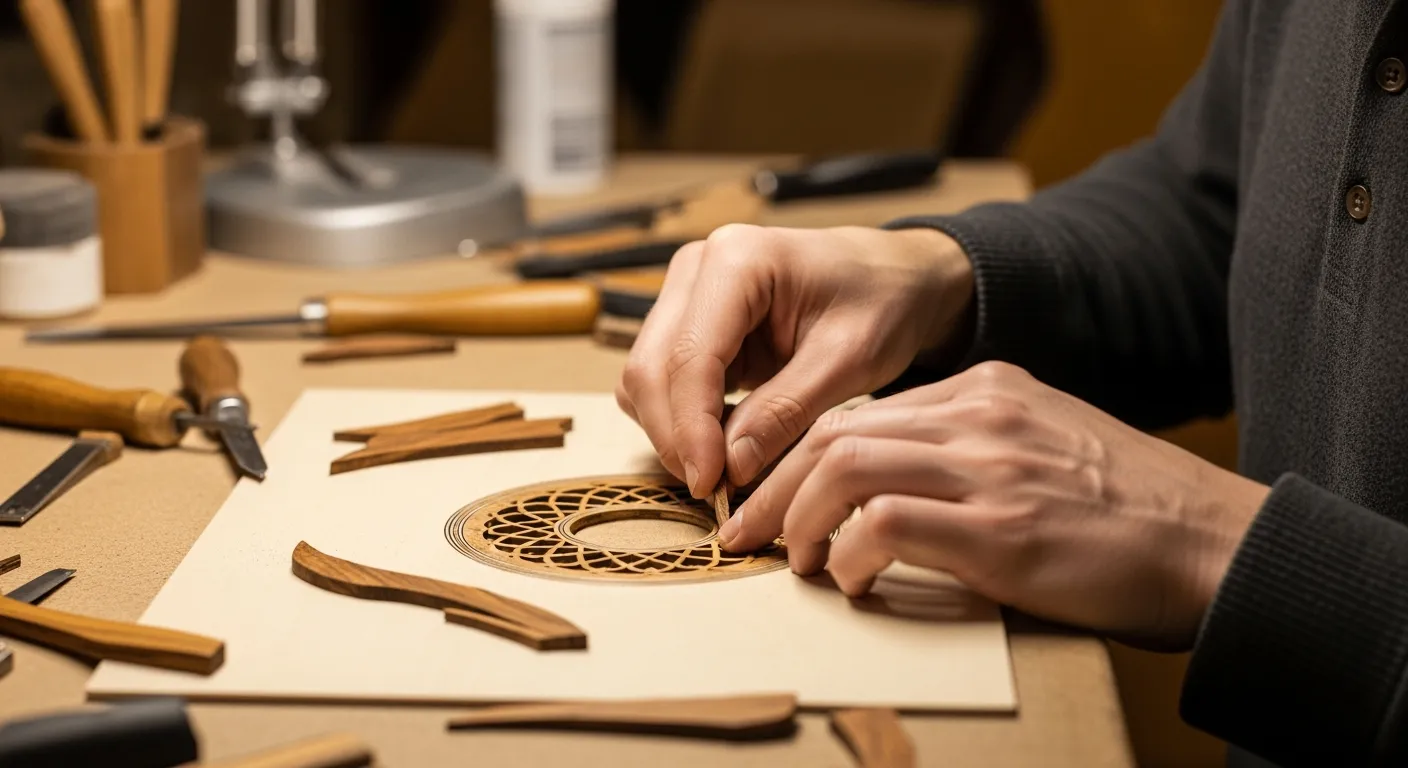
The color variations in ziricote can range from light tan to dark chocolate brown, offering a wide spectrum of possibilities for design. This natural variation ensures that no two ziricote rosettes will ever be exactly alike.
When selecting ziricote for a rosette, consider the overall color scheme of the guitar and choose a piece that complements the other woods used. A darker piece of ziricote can provide a dramatic contrast against a lighter soundboard, while a lighter piece can create a more subtle and elegant effect.
The tonal properties of ziricote are often described as being similar to those of rosewood, but with a slightly brighter and more focused sound. This makes it a great choice for instruments that require clarity and projection.
Ziricote’s density and hardness also contribute to its resistance to moisture and temperature changes, making it a stable and reliable material for use in musical instruments. This stability is crucial for maintaining the integrity of the rosette over time.
The “spider-webbing” effect in ziricote is caused by mineral deposits and irregular grain patterns, creating a mesmerizing visual texture. This unique characteristic sets ziricote apart from other hardwoods and makes it a favorite among luthiers and woodworkers.
Understanding the unique properties of ziricote is essential for working with it effectively and creating beautiful, long-lasting rosettes. By carefully selecting and preparing the wood, you can unlock its full potential and create stunning visual effects.
When sourcing ziricote, it’s important to ensure that it comes from sustainable and responsible sources. This helps protect the environment and ensures that this beautiful wood will be available for future generations.
Consider the orientation of the grain when cutting ziricote for a rosette. The direction of the grain can affect the visual impact of the rosette and its structural integrity.
Experiment with different finishes to enhance the natural beauty of ziricote. A clear finish will allow the grain and color variations to shine through, while a tinted finish can add depth and warmth.
Why Ziricote is a Great Choice for Rosette Inlays
Ziricote offers several advantages when used for rosette inlays. Its unique grain patterns ensure that each rosette is one-of-a-kind, adding a distinctive touch to the instrument.
The dramatic color contrast of ziricote allows for visually striking designs that can complement the overall aesthetic of the guitar. Unlike some other decorative woods, ziricote’s hardness ensures that it can withstand the wear and tear associated with regular playing.
Its stability also means that it is less likely to crack or warp over time, preserving the integrity of the rosette. The tonal qualities of ziricote, while less critical in a rosette than in the body of the guitar, still contribute to the instrument’s overall sound.
Many luthiers appreciate how ziricote enhances the clarity and sustain of the instrument, even in small applications like rosettes. These factors combine to make ziricote a top choice for luthiers seeking to create visually and sonically appealing instruments.
The unique grain patterns of ziricote make each rosette a miniature work of art, adding a touch of individuality to the instrument. This is especially appealing to musicians who value uniqueness and craftsmanship.
The high contrast between the dark lines and lighter background in ziricote allows for intricate designs to stand out, creating a focal point on the guitar’s soundboard. This contrast can be further enhanced by combining ziricote with other materials, such as light-colored woods or abalone.
Ziricote’s hardness and density make it resistant to scratches and dents, ensuring that the rosette will maintain its appearance for years to come. This durability is especially important for instruments that are frequently played or transported.
The stability of ziricote means that it is less likely to expand or contract with changes in humidity, preventing cracks or gaps from forming around the rosette. This stability is crucial for maintaining the structural integrity of the instrument.
While the tonal contribution of a rosette is subtle, ziricote’s natural resonance can enhance the overall sound of the guitar, adding warmth and clarity. This is especially noticeable in instruments with a brighter or more focused tone.
Ziricote is also relatively easy to work with, making it a good choice for both experienced luthiers and beginners. It cuts cleanly, glues well, and sands smoothly, allowing for precise and professional results.
The visual appeal of ziricote can also increase the perceived value of the instrument, making it more desirable to potential buyers. A well-crafted ziricote rosette can be a selling point for guitars, especially those in the higher price range.
Ziricote’s unique combination of beauty, durability, and tonal properties makes it a top choice for luthiers who want to create instruments that are both visually stunning and sonically pleasing. It’s a material that adds character and distinction to any guitar.
The use of ziricote in rosettes also allows for a wide range of design possibilities, from simple and elegant to complex and intricate. This versatility makes it a popular choice for luthiers who want to express their creativity and individuality.
Choosing ziricote for a rosette inlay is a decision that reflects a commitment to quality and craftsmanship. It’s a material that elevates the instrument to a higher level of artistry and sophistication.
Ultimately, the choice of ziricote for a rosette is a personal one, but its many advantages make it a compelling option for luthiers and musicians alike. It’s a material that embodies beauty, durability, and tonal excellence.
Cutting and Shaping Ziricote for Intricate Designs
Working with ziricote requires precision and care, particularly when cutting and shaping it for intricate rosette designs. Due to its hardness, sharp tools are essential to achieve clean cuts and avoid splintering.
A good starting point is to use a fine-toothed saw for initial cuts, followed by more precise shaping with files and sandpaper. Here is a table showing recommended tools for cutting and shaping ziricote, along with their best uses.
| Tool | Best Use | Notes |
|---|---|---|
| Fine-toothed saw | Initial cuts, rough shaping | Use a high TPI (teeth per inch) saw |
| X-Acto knife | Detailed cuts, fine adjustments | Keep blades sharp for clean edges |
| Needle files | Shaping curves and tight spaces | Variety of shapes for different contours |
| Sandpaper | Smoothing edges, final shaping | Start with coarse grit, finish with fine grit |
When creating complex patterns, consider using templates or stencils to guide your cuts. These can be made from thin plywood or acrylic and help ensure consistency and accuracy.
For circular rosettes, a circle cutter or a router with a circle-cutting jig can be invaluable. Remember to work slowly and deliberately, allowing the tools to do the work rather than forcing them.
When cutting ziricote, it’s crucial to support the wood properly to prevent it from vibrating or shifting during the cutting process. This can be achieved by using clamps or a vise to hold the wood securely in place.
For intricate designs, consider using a scroll saw or a laser cutter to achieve precise and clean cuts. These tools can be especially helpful for creating complex geometric patterns or floral motifs.
When shaping ziricote with files, use a light touch and avoid applying too much pressure. This will prevent the wood from chipping or splintering and ensure a smooth, even surface.
Sandpaper is essential for smoothing the edges of ziricote and blending it seamlessly with the surrounding wood. Start with a coarse grit sandpaper to remove any imperfections, and then gradually move to finer grits to achieve a polished finish.
When working with ziricote, it’s important to wear a dust mask to protect yourself from inhaling the fine wood particles. Ziricote dust can be irritating to the lungs and eyes.
Consider using a vacuum system to remove dust and debris from your work area. This will help keep your tools clean and prevent the dust from settling on the wood.
For particularly challenging cuts, try using a lubricant such as beeswax or paraffin wax to reduce friction and prevent the wood from overheating. This can also help to prevent splintering and chipping.
When creating circular rosettes, a circle cutter with adjustable blades can be a valuable tool. This allows you to create precise and consistent circles of varying sizes.
If you are using a router to cut circles, be sure to use a sharp bit and a stable jig. This will help to prevent the router from wandering and ensure a clean, accurate cut.
Remember to always work in a well-lit area to ensure that you can see the details of your work clearly. This will help you to avoid mistakes and achieve a professional finish.
Patience and attention to detail are key when cutting and shaping ziricote for intricate designs. By taking your time and using the right tools, you can create stunning rosettes that will enhance the beauty of any guitar.
Gluing and Finishing Ziricote Inlays
Gluing ziricote inlays requires careful attention to ensure a strong and seamless bond. The choice of glue is crucial, with many luthiers preferring epoxy or superglue (cyanoacrylate) for their strength and gap-filling properties.
Before applying glue, make sure both the ziricote inlay and the soundboard surface are clean and free of dust or oil. A light sanding of the surfaces to be glued can improve adhesion.
Apply a thin, even layer of glue to both surfaces, and then carefully position the inlay. Use clamps or weights to hold the inlay in place while the glue dries, ensuring that it sits flush with the soundboard.
Once the glue is fully cured, carefully remove any excess glue with a sharp chisel or scraper. Sand the entire area smooth, blending the inlay seamlessly with the surrounding wood.
When using epoxy, be sure to mix the resin and hardener thoroughly according to the manufacturer’s instructions. An inaccurate mix can result in a weak or brittle bond.
Superglue (cyanoacrylate) is a good choice for small inlays or tight-fitting joints. However, it dries very quickly, so you need to work fast and accurately.
Consider using a gel-type superglue, which is less likely to run and provides more control during application. This is particularly useful for intricate rosette designs.
When clamping the inlay, use cauls or pads to protect the soundboard from being damaged by the clamps. Cauls distribute the pressure evenly and prevent indentations.
After the glue has dried, use a sharp chisel or scraper to carefully remove any excess glue. Be careful not to scratch or damage the surrounding wood.
Sand the inlay flush with the soundboard using progressively finer grits of sandpaper. Start with a coarse grit to remove any imperfections, and then gradually move to finer grits to achieve a smooth, polished surface.
When sanding, use a sanding block to ensure that the surface remains flat and even. This will prevent you from creating dips or bumps in the soundboard.
Before applying the finish, clean the surface thoroughly to remove any dust or debris. Use a tack cloth or a vacuum to ensure that the surface is completely clean.
Choose a finish that is compatible with ziricote and the other woods used in the guitar. Nitrocellulose lacquer, polyurethane, and varnish are all popular choices.
Apply the finish in thin, even coats, allowing each coat to dry completely before applying the next. This will help to prevent runs, drips, and other imperfections.
After the final coat of finish has dried, buff the surface to a high gloss using a polishing compound and a soft cloth. This will enhance the natural beauty of the ziricote and protect it from scratches and wear.
Combining Ziricote with Other Materials in Rosettes
Ziricote’s unique appearance makes it an excellent material for combining with other woods and materials in rosette designs. Contrasting light and dark woods, such as maple or ebony, can create striking visual effects.
Incorporating materials like abalone or mother-of-pearl can add a touch of elegance and iridescence to the rosette. Here is a list of materials that combine well with ziricote in rosette inlays.
- Maple: Provides a light, contrasting color
- Ebony: Offers a dark, sleek accent
- Abalone: Adds iridescence and shimmer
- Mother-of-pearl: Creates a classic, elegant look
- Boxwood: A fine-grained wood for intricate details
When combining materials, consider the overall color palette and how the different textures will complement each other. Experiment with different arrangements and patterns to find a design that suits your aesthetic preferences.
Remember to use the same cutting and gluing techniques as with ziricote alone, ensuring clean cuts and strong bonds. A well-executed combination of materials can elevate the rosette from a simple inlay to a stunning focal point of the guitar.
When combining ziricote with maple, the light color of the maple provides a beautiful contrast to the dark, intricate grain of the ziricote. This combination is often used to create a classic and elegant look.
Ebony, with its deep black color, can be used to create a more dramatic and modern look when combined with ziricote. The contrast between the two woods is striking and eye-catching.
Abalone and mother-of-pearl add a touch of iridescence and shimmer to the rosette, creating a luxurious and sophisticated effect. These materials are often used in combination with ziricote to create a truly unique and stunning design.
Boxwood, with its fine grain and light color, is a great choice for creating intricate details in the rosette. It can be used to create delicate lines and patterns that complement the bold grain of the ziricote.
Consider using thin veneers of different materials to create a layered effect in the rosette. This can add depth and complexity to the design.
Experiment with different shapes and patterns to create a unique and eye-catching rosette. Geometric shapes, floral motifs, and abstract designs can all be used to create a stunning effect.
When gluing different materials together, be sure to use a glue that is compatible with all of the materials being used. Epoxy is a good choice for gluing wood, abalone, and mother-of-pearl.
Use clamps or weights to hold the materials in place while the glue dries. This will ensure that the bond is strong and that the materials are properly aligned.
After the glue has dried, carefully sand the rosette smooth, blending the different materials together seamlessly. Use progressively finer grits of sandpaper to achieve a polished finish.
Apply a finish that enhances the natural beauty of the materials and protects them from moisture and wear. A clear finish will allow the colors and textures of the materials to shine through.
Tips for Achieving a Professional Look with Ziricote Inlays
Achieving a professional look with ziricote rosettes requires attention to detail and a commitment to quality craftsmanship. Start by selecting high-quality ziricote with interesting and consistent grain patterns.
Invest in sharp, well-maintained tools to ensure clean cuts and avoid splintering. Practice your cutting and shaping techniques on scrap pieces of ziricote before working on the actual rosette.
Take your time with the gluing process, ensuring that the inlay is properly aligned and securely bonded. Sand the finished rosette smooth, paying attention to any imperfections or gaps.
Apply a finish that enhances the natural beauty of the ziricote while providing protection from moisture and wear. With patience and practice, you can create ziricote rosettes that rival those of professional luthiers.
When selecting ziricote, look for pieces that are free of cracks, knots, and other imperfections. The grain should be straight and consistent, with a minimum of runout.
Sharpen your tools regularly to ensure that they are cutting cleanly and efficiently. Dull tools can cause splintering and tearout, which can ruin your work.
Practice your cutting and shaping techniques on scrap pieces of ziricote before working on the actual rosette. This will help you to develop your skills and avoid making mistakes on the finished piece.
When gluing the rosette in place, use a thin, even layer of glue and apply gentle pressure to ensure that the inlay is properly seated. Avoid using too much glue, as this can cause squeeze-out and make it difficult to clean up.
After the glue has dried, carefully sand the rosette smooth, blending it seamlessly with the surrounding wood. Use progressively finer grits of sandpaper to achieve a polished finish.
Pay attention to any imperfections or gaps in the rosette. These can be filled with epoxy or wood filler, but it’s best to avoid them altogether by taking your time and working carefully.
When applying the finish, use a high-quality product that is designed for use on musical instruments. Follow the manufacturer’s instructions carefully to ensure that the finish is applied properly.
Apply the finish in thin, even coats, allowing each coat to dry completely before applying the next. This will help to prevent runs, drips, and other imperfections.
After the final coat of finish has dried, buff the surface to a high gloss using a polishing compound and a soft cloth. This will enhance the natural beauty of the ziricote and protect it from scratches and wear.
Inspect the finished rosette carefully for any imperfections or flaws. If you find any, correct them before presenting the instrument to the customer.
By following these tips, you can achieve a professional look with your ziricote rosettes and create instruments that are both beautiful and functional.
Troubleshooting Common Issues with Ziricote Inlays
Even with careful preparation, you might encounter issues when working with ziricote. One common problem is splintering during cutting, which can be minimized by using sharp tools and making shallow cuts.
Another issue is gaps between the inlay and the soundboard, which can be filled with epoxy mixed with ziricote dust. Uneven sanding can also be a problem, leading to an unprofessional look.
To avoid this, use a sanding block and work your way through progressively finer grits of sandpaper. If the finish is uneven or cloudy, it may be due to improper application or inadequate surface preparation.
Always follow the manufacturer’s instructions for the finish you are using, and ensure that the surface is clean and dry before application. Addressing these common issues with patience and attention to detail will help you achieve a flawless finish.
Splintering can also occur if the ziricote is too dry. Try to keep the wood at a consistent humidity level to prevent this issue.
When filling gaps with epoxy and ziricote dust, be sure to match the color of the dust to the surrounding wood. This will help to make the repair less noticeable.
Uneven sanding can also be caused by using too much pressure or by using sandpaper that is too coarse. Start with a finer grit sandpaper and gradually increase the grit as needed.
If the finish is cloudy, it may be due to moisture trapped beneath the finish. Make sure the wood is completely dry before applying the finish.
Another common issue is the finish cracking over time. This can be caused by changes in humidity or temperature. Store the guitar in a stable environment to prevent this.
If the finish is scratched, it can be repaired with a polishing compound. Apply the compound to a soft cloth and rub it gently over the scratched area.
Sometimes the inlay can lift slightly over time. This is usually due to changes in humidity. Use a small amount of glue to reattach the inlay.
If the glue line is visible, it can be hidden with a small amount of stain or finish. Match the color of the stain or finish to the surrounding wood.
Always test your techniques on scrap wood before working on the actual inlay. This will help you to avoid making mistakes.
Remember, patience is key when working with ziricote inlays. Take your time and pay attention to detail, and you will be able to create beautiful and long-lasting rosettes.
Exploring Different Ziricote Rosette Design Ideas
The possibilities for ziricote rosette designs are virtually endless, limited only by your imagination. One popular design is a simple circular rosette with alternating rings of ziricote and maple.
Another option is to create a more complex pattern with geometric shapes or floral motifs. Consider incorporating thin strips of abalone or mother-of-pearl to add a touch of elegance.
Experiment with different color combinations and textures to create a unique and eye-catching design. You might also draw inspiration from traditional rosette patterns found in classical guitars or other instruments.
Ultimately, the best design is one that reflects your personal style and complements the overall aesthetic of the guitar. Don’t be afraid to try new things and push the boundaries of what’s possible with ziricote.
Consider using a combination of different widths of ziricote rings to create a dynamic and visually interesting rosette. Varying the widths can add depth and dimension to the design.
Geometric shapes, such as triangles, squares, and diamonds, can be arranged in a variety of patterns to create a modern and sophisticated rosette. These shapes can be cut from ziricote or other contrasting woods.
Floral motifs, such as vines, leaves, and flowers, can be incorporated into the rosette to create a more organic and natural look. These motifs can be carved or inlaid into the ziricote.
Abalone and mother-of-pearl can be used to create shimmering accents in the rosette. These materials can be inlaid into the ziricote in the form of dots, lines, or other shapes.
Consider using different colors of ziricote to create a more visually striking rosette. The natural variations in color within ziricote can be used to create subtle or dramatic effects.
Experiment with different textures, such as carving, etching, or sandblasting, to add depth and dimension to the rosette. These techniques can be used to create a variety of different effects.
Look at traditional rosette patterns from classical guitars, flamenco guitars, and other instruments for inspiration. These patterns can be adapted and modified to create your own unique designs.
Consider the overall style of the guitar when designing the rosette. The rosette should complement the other design elements of the guitar, such as the headstock, bridge, and binding.
Don’t be afraid to experiment with different materials and techniques. The best way to create a unique and eye-catching rosette is to try new things and push the boundaries of what’s possible.
Remember that the rosette is a small but important detail that can have a big impact on the overall look of the guitar. Take your time and create a design that you are proud of.
Maintaining and Protecting Your Ziricote Rosette Inlay
Once your ziricote rosette inlay is complete, it’s important to take steps to maintain and protect it. Regular cleaning with a soft, dry cloth will help remove dust and fingerprints.
Avoid using harsh chemicals or abrasive cleaners, as these can damage the finish. Store your guitar in a case when not in use to protect it from scratches and dings.
If the finish becomes dull or scratched, you may need to reapply a fresh coat of finish. Consult with a qualified luthier for advice on the best way to care for your ziricote rosette.
With proper care, your ziricote rosette will continue to enhance the beauty of your guitar for years to come. These steps will ensure it remains a striking feature of your instrument.
Use a soft, lint-free cloth to clean the rosette. Microfiber cloths are a good choice, as they are gentle and effective at removing dust and fingerprints.
Avoid using polishes or waxes on the rosette, as these can build up over time and dull the finish. If you must use a polish, choose one that is specifically designed for use on musical instruments.
Protect the rosette from scratches by storing the guitar in a case when not in use. A hard case is the best option, as it provides the most protection.
Avoid exposing the guitar to extreme temperatures or humidity levels. These conditions can damage the finish and cause the wood to crack or warp.
If the rosette is exposed to sunlight for extended periods, the finish may fade or yellow over time. Keep the guitar out of direct sunlight whenever possible.
If the finish becomes scratched or damaged, it can be repaired by a qualified luthier. Do not attempt to repair the finish yourself, as this could cause further damage.
Regularly inspect the rosette for any signs of damage, such as cracks, chips, or lifting. If you notice any damage, have it repaired as soon as possible.